
B. Getting Started
Configure the Assistant
Set how your representative appears and opens a conversation: its display name, avatar, greeting message, and clickable conversation starters.
By aninditoUpdated 6 Sep 2026
This guide defines how your representative appears and introduces itself when a visitor opens the chat. At this stage you are not teaching it about your business yet; you are shaping its first impression.
Step 1: Set the name and avatar
Open your domain, then go to Settings > Appearance.
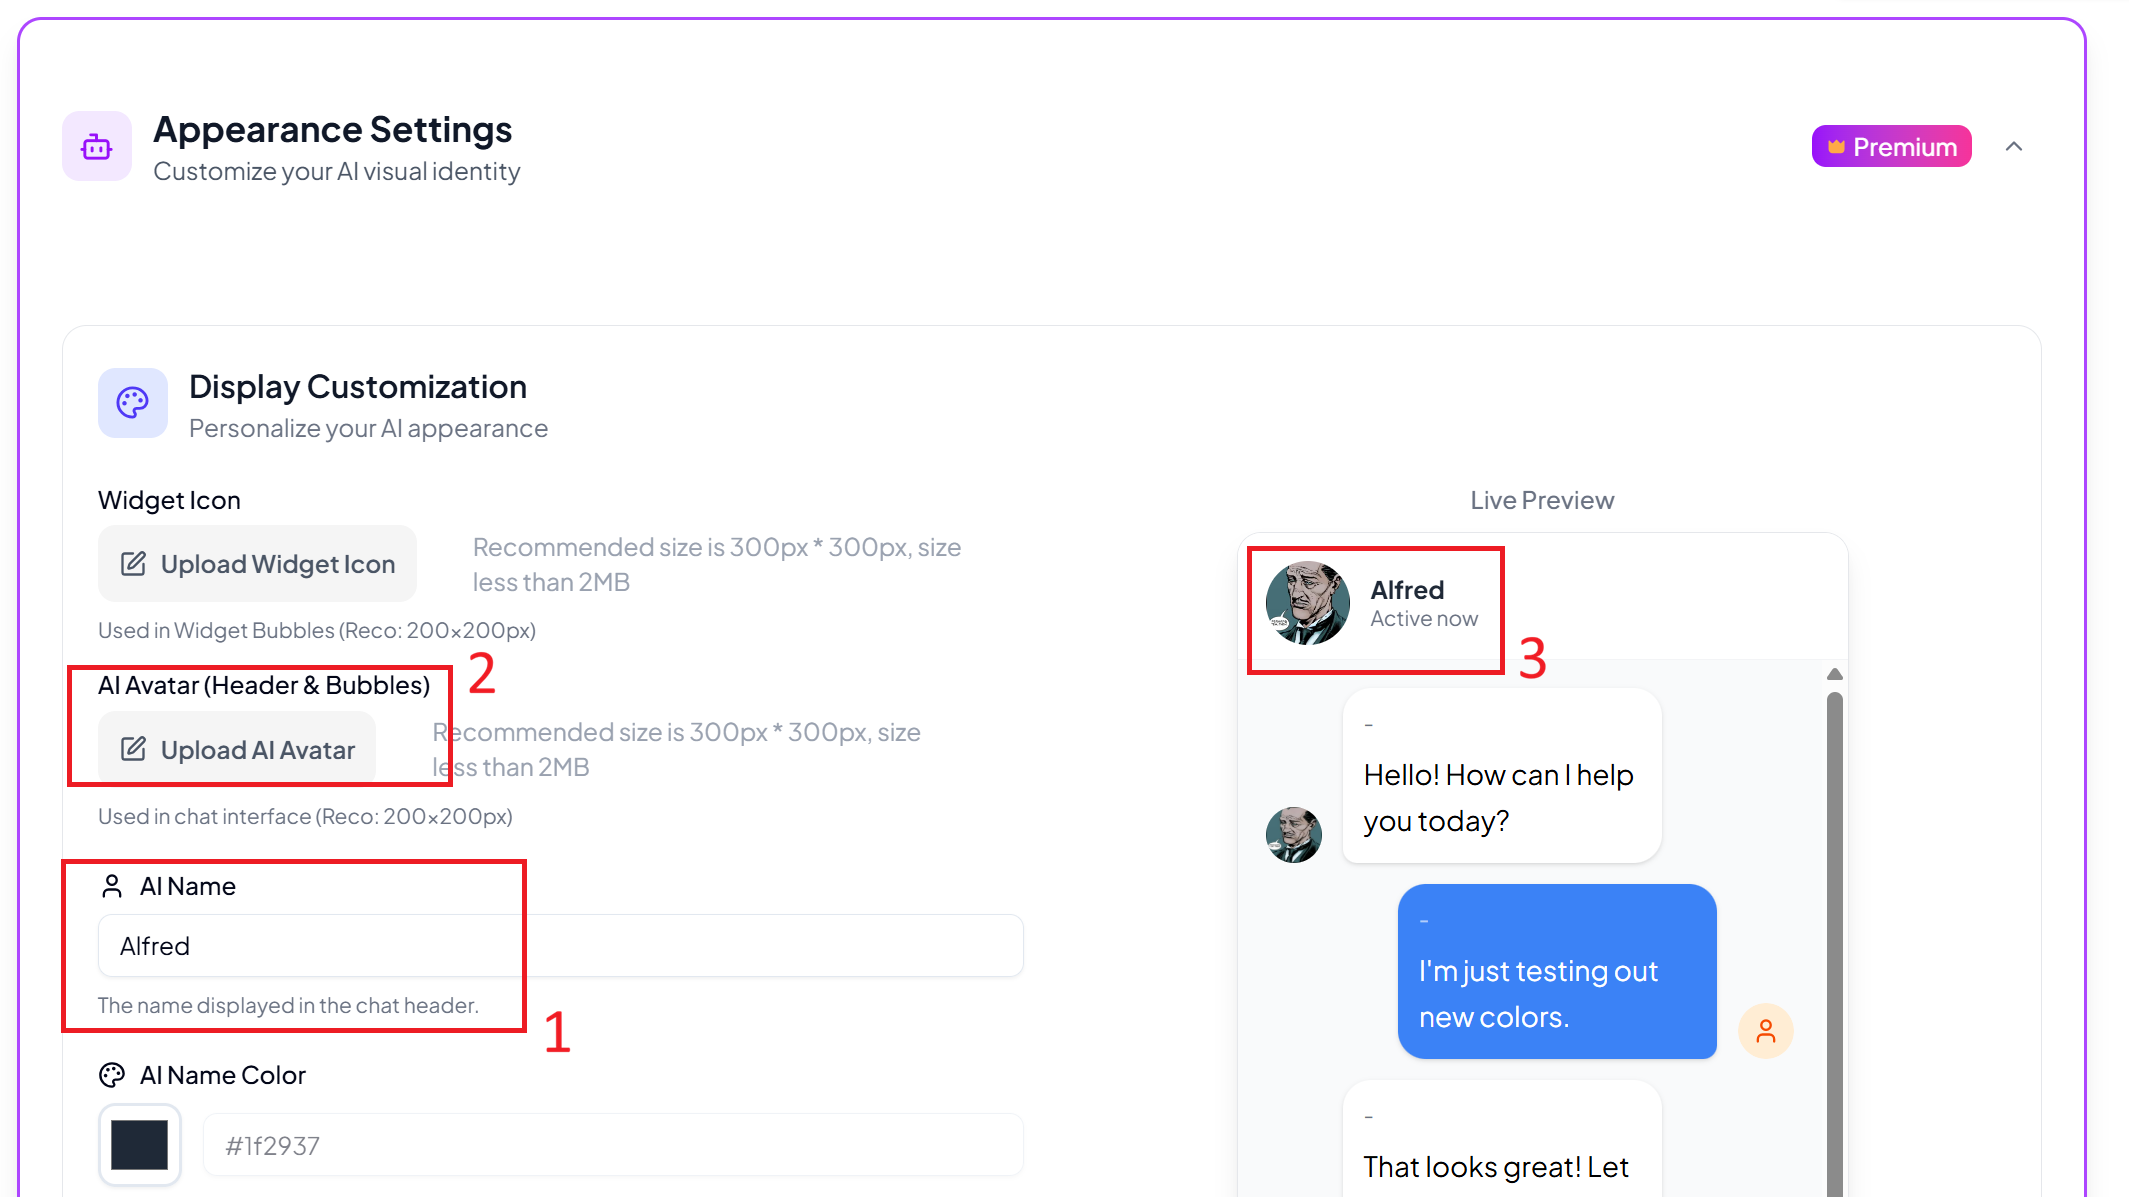
- Enter the representative name.
- Upload an avatar image.
- Preview how visitors will see it.
Choose a name that fits your business style. It can be formal, friendly, or brand-based.
Step 2: Write the greeting
Go to Settings > Conversation.
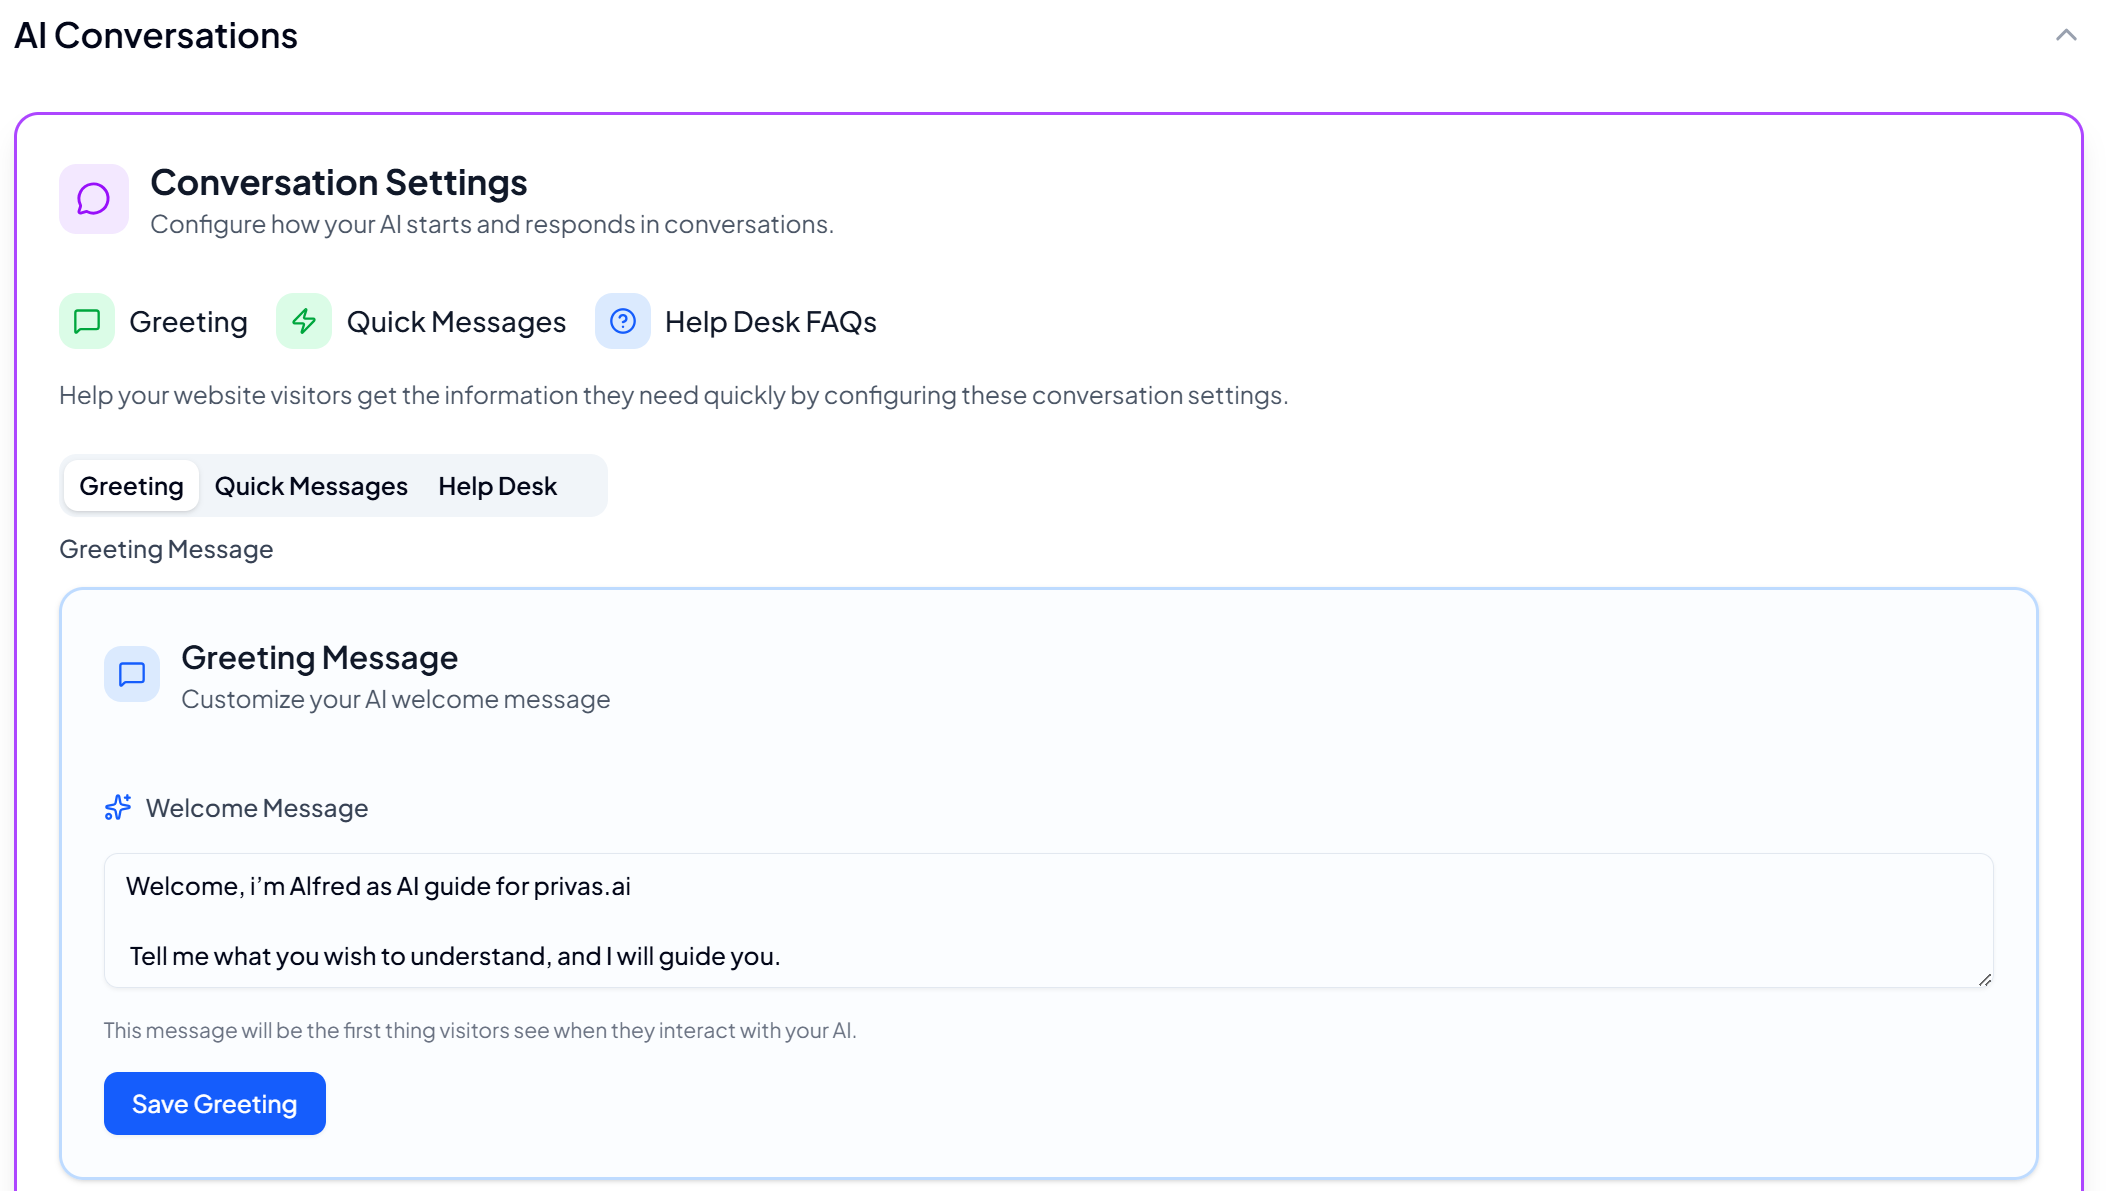
The greeting is the first message shown when the chat opens. A good greeting welcomes the visitor, says what the assistant can help with, and invites a question. For example:
"Hi! I can help you understand our services and answer common questions. What would you like to know?"
Step 3: Add quick messages
In the same Conversation settings, open Quick Messages.
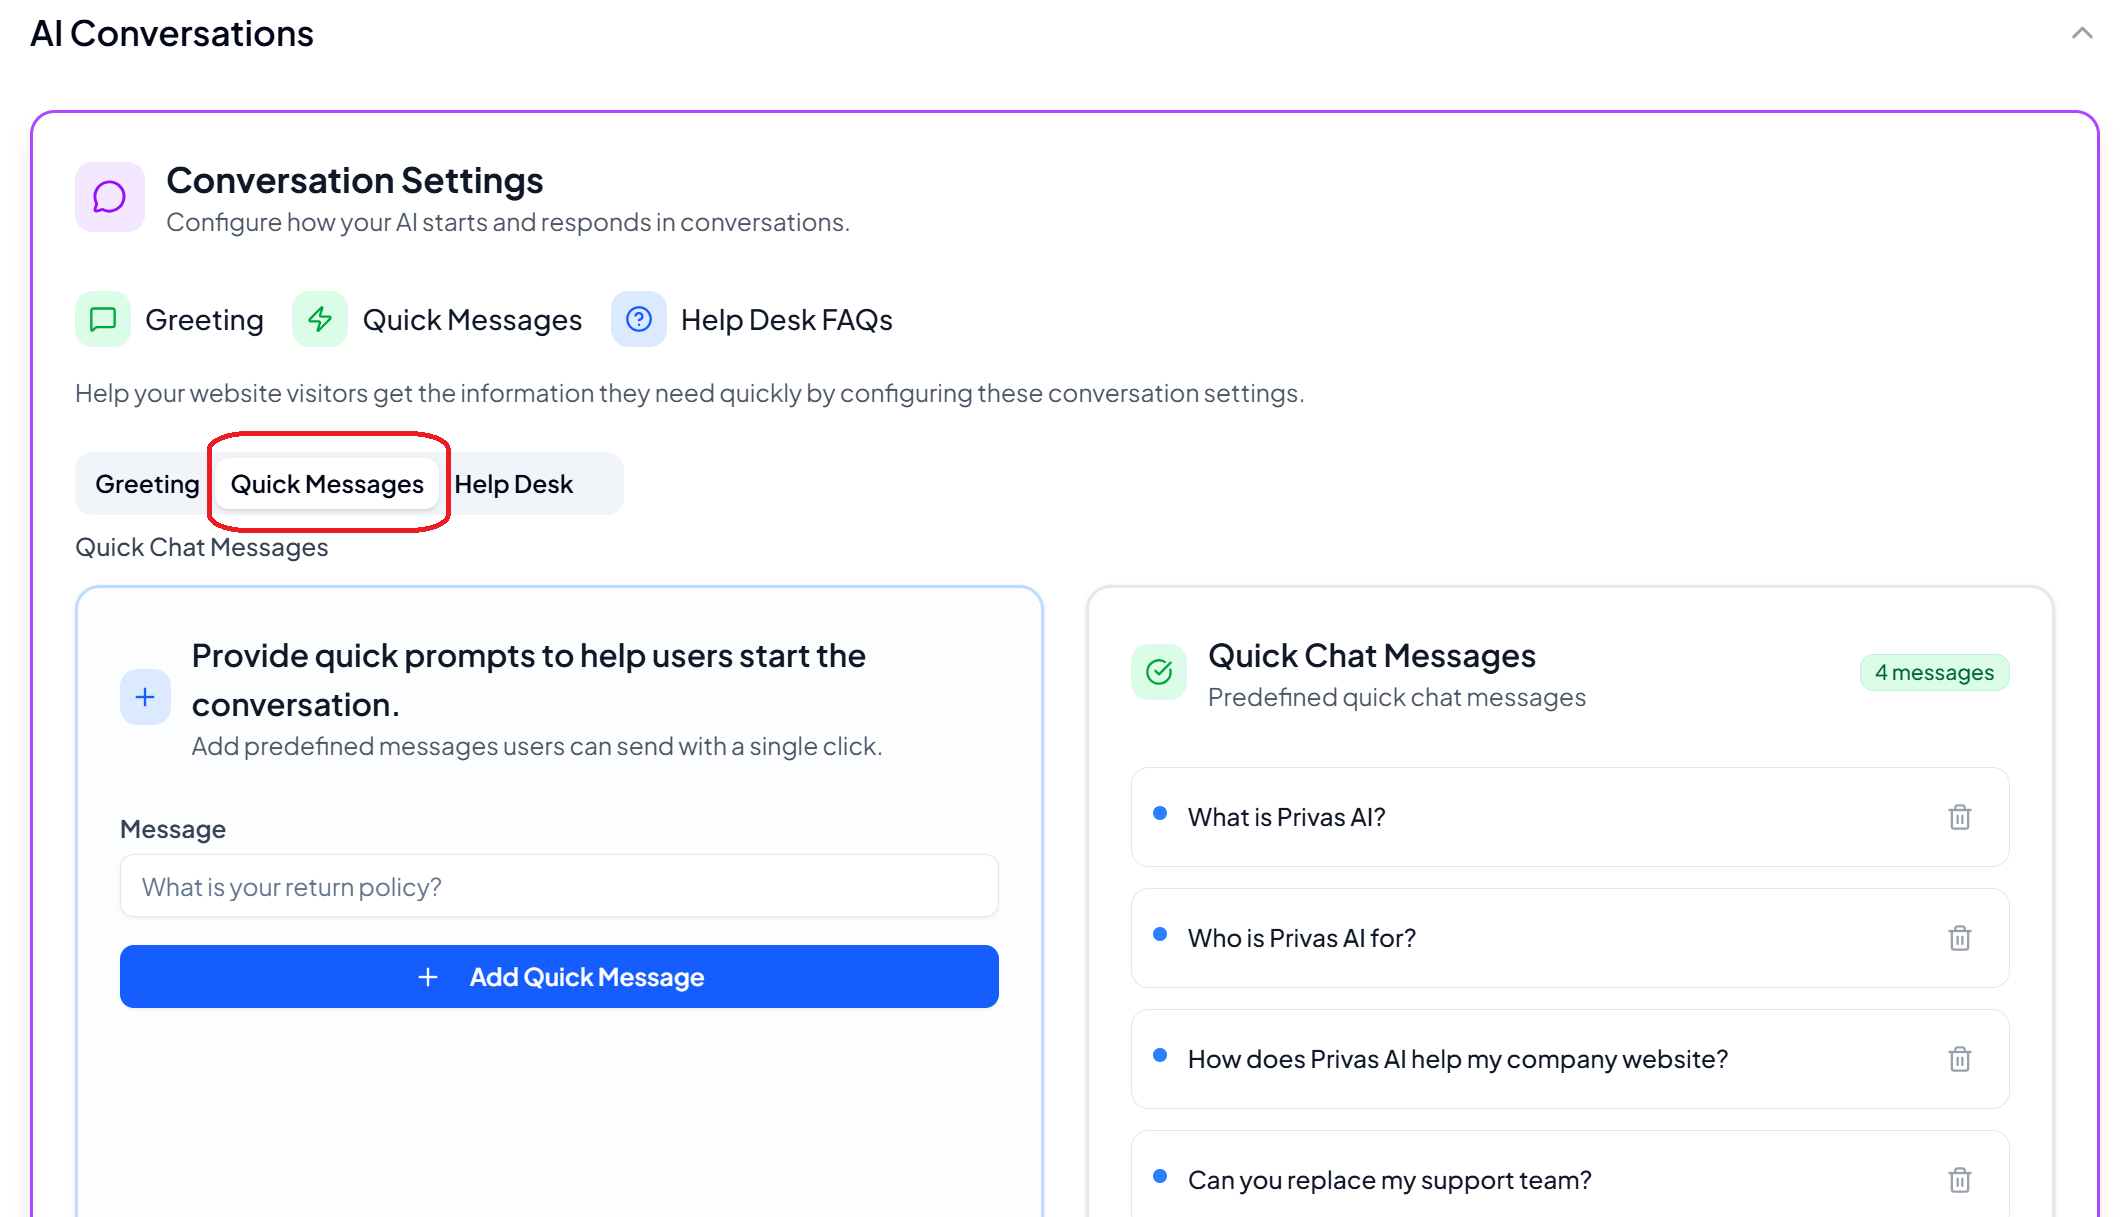
Quick messages are clickable suggestions shown when the chat opens, so visitors can start without typing. Keep them common and relevant, for example:
- "What does this company do?"
- "How can I get started?"
- "Do you have pricing information?"
About the Help Desk
You may notice a Help Desk section in Conversation settings. On the visitor chat, that role is now filled by the Capability Guide, which shows what the assistant can do and offers example prompts a visitor can tap to fill the message box. Set it up in Capability Guide.
What this covers, and what it does not
These settings control how the assistant appears and starts a conversation. They do not give it business knowledge yet. If a visitor asks detailed questions now, it may not answer correctly. That is expected until you add knowledge.
Next step
Continue to Define AI Behaviour to shape how the assistant communicates.