D. Widget Integration
Install Privas AI on WIX
Embed the AI representative on WIX
By aninditoUpdated 4 Mar 2026
WIX allows you to embed external scripts or components.
You can add the Privas AI representative by inserting the Privas embed script.
This guide explains how to install the Privas AI widget on a WIX website.
Why this matters
Embedding the representative in Wix:
- Makes your AI representative accessible to visitors
- Keeps communication consistent
- Requires no coding knowledge
This affects only the page where you place the embed element.
It does not modify your website layout, design system, SEO structure, or business settings.
Before You Start
Make sure you have:
- Access to your Wix account
- Your Privas AI Website Widget Embed Code
You can copy the embed code from your Privas AI Domain Dashboard.
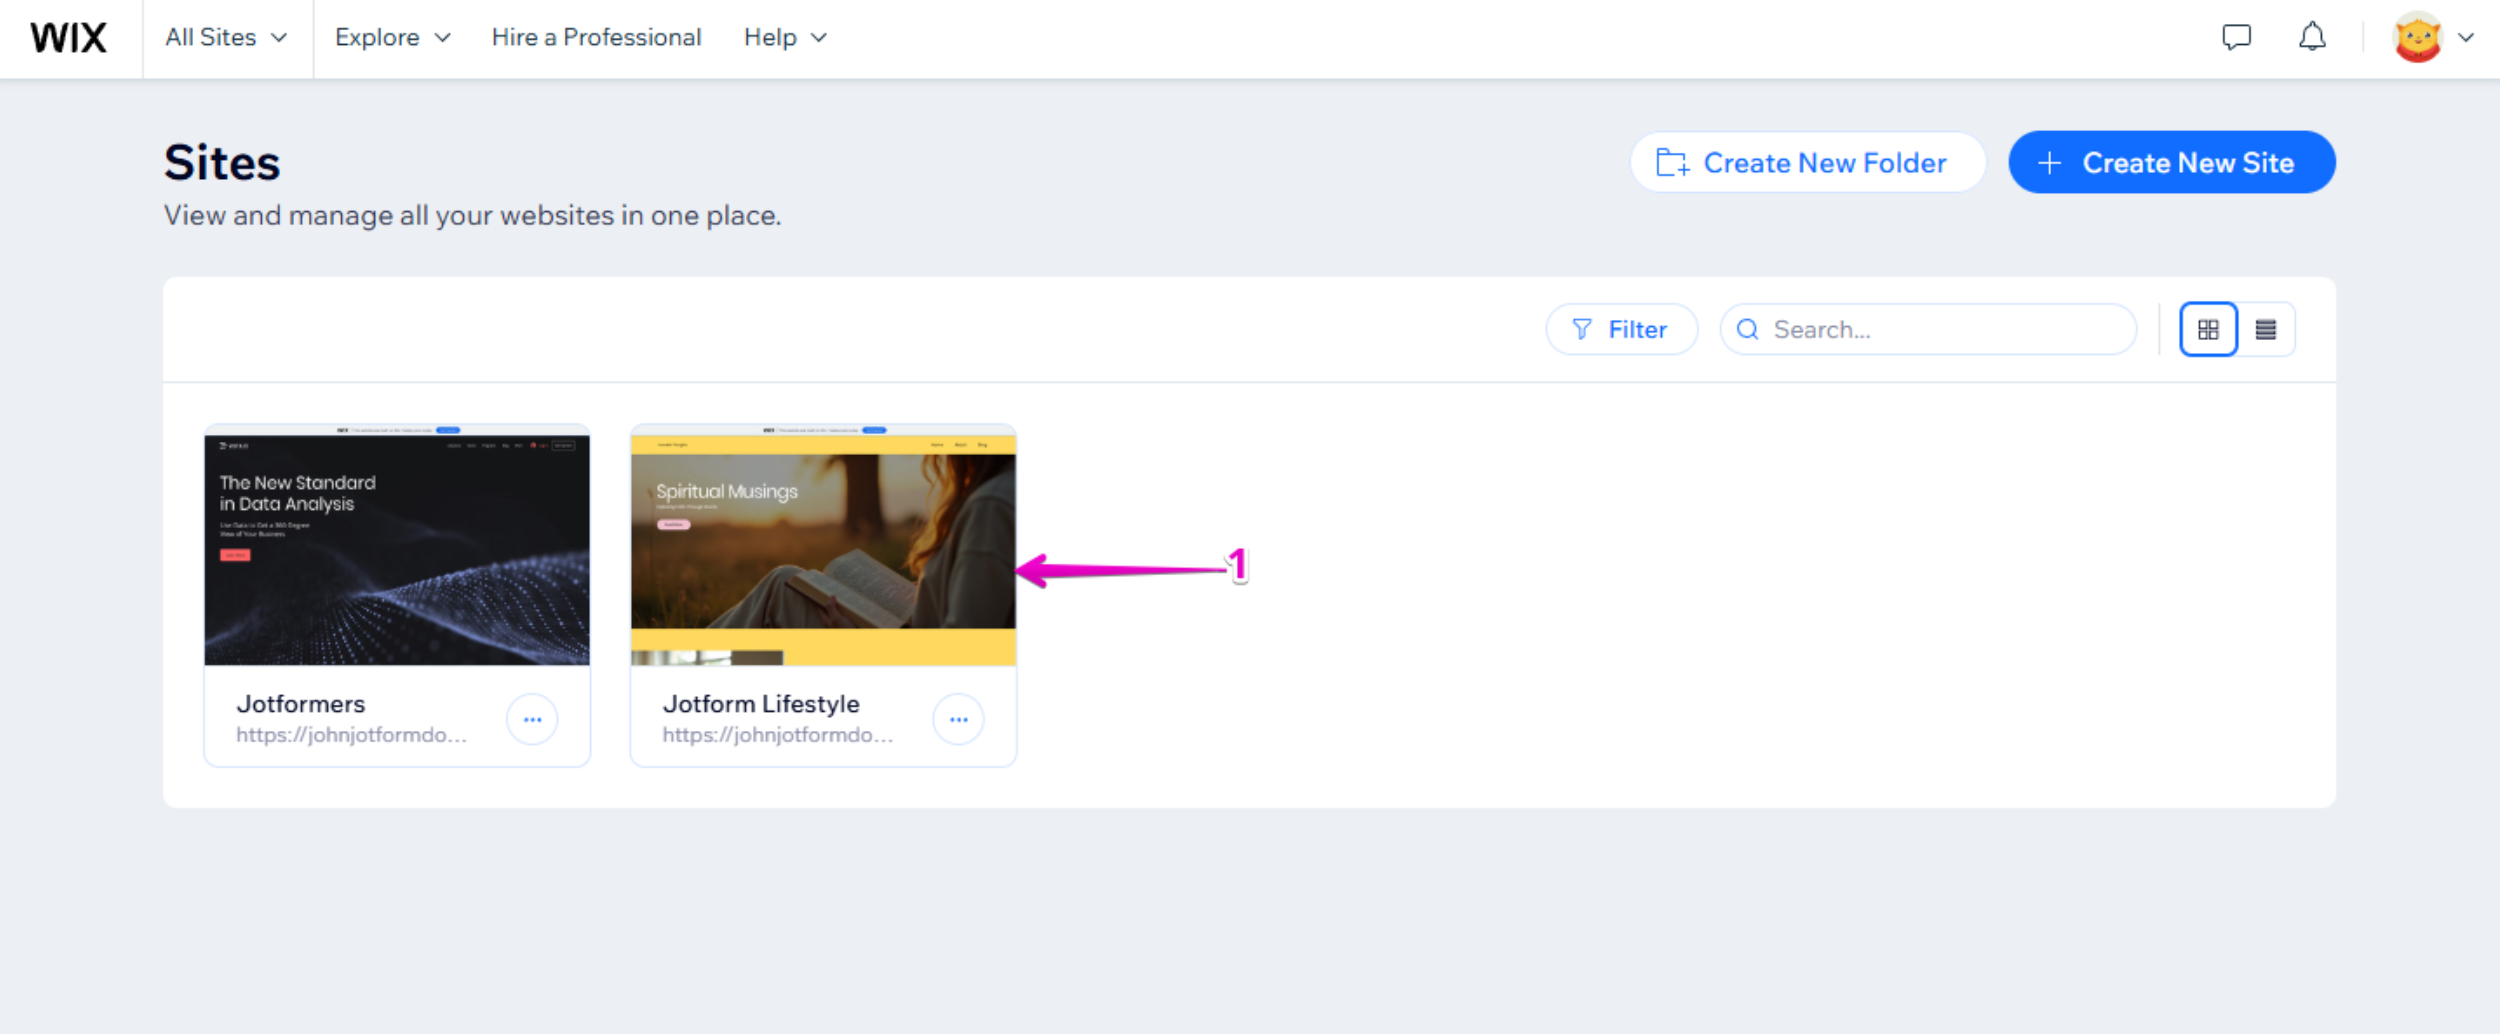
Step 1 — Open Your Wix Site
- Log in to your Wix Account.
- On the Sites page, select the website where you want to install the assistant.
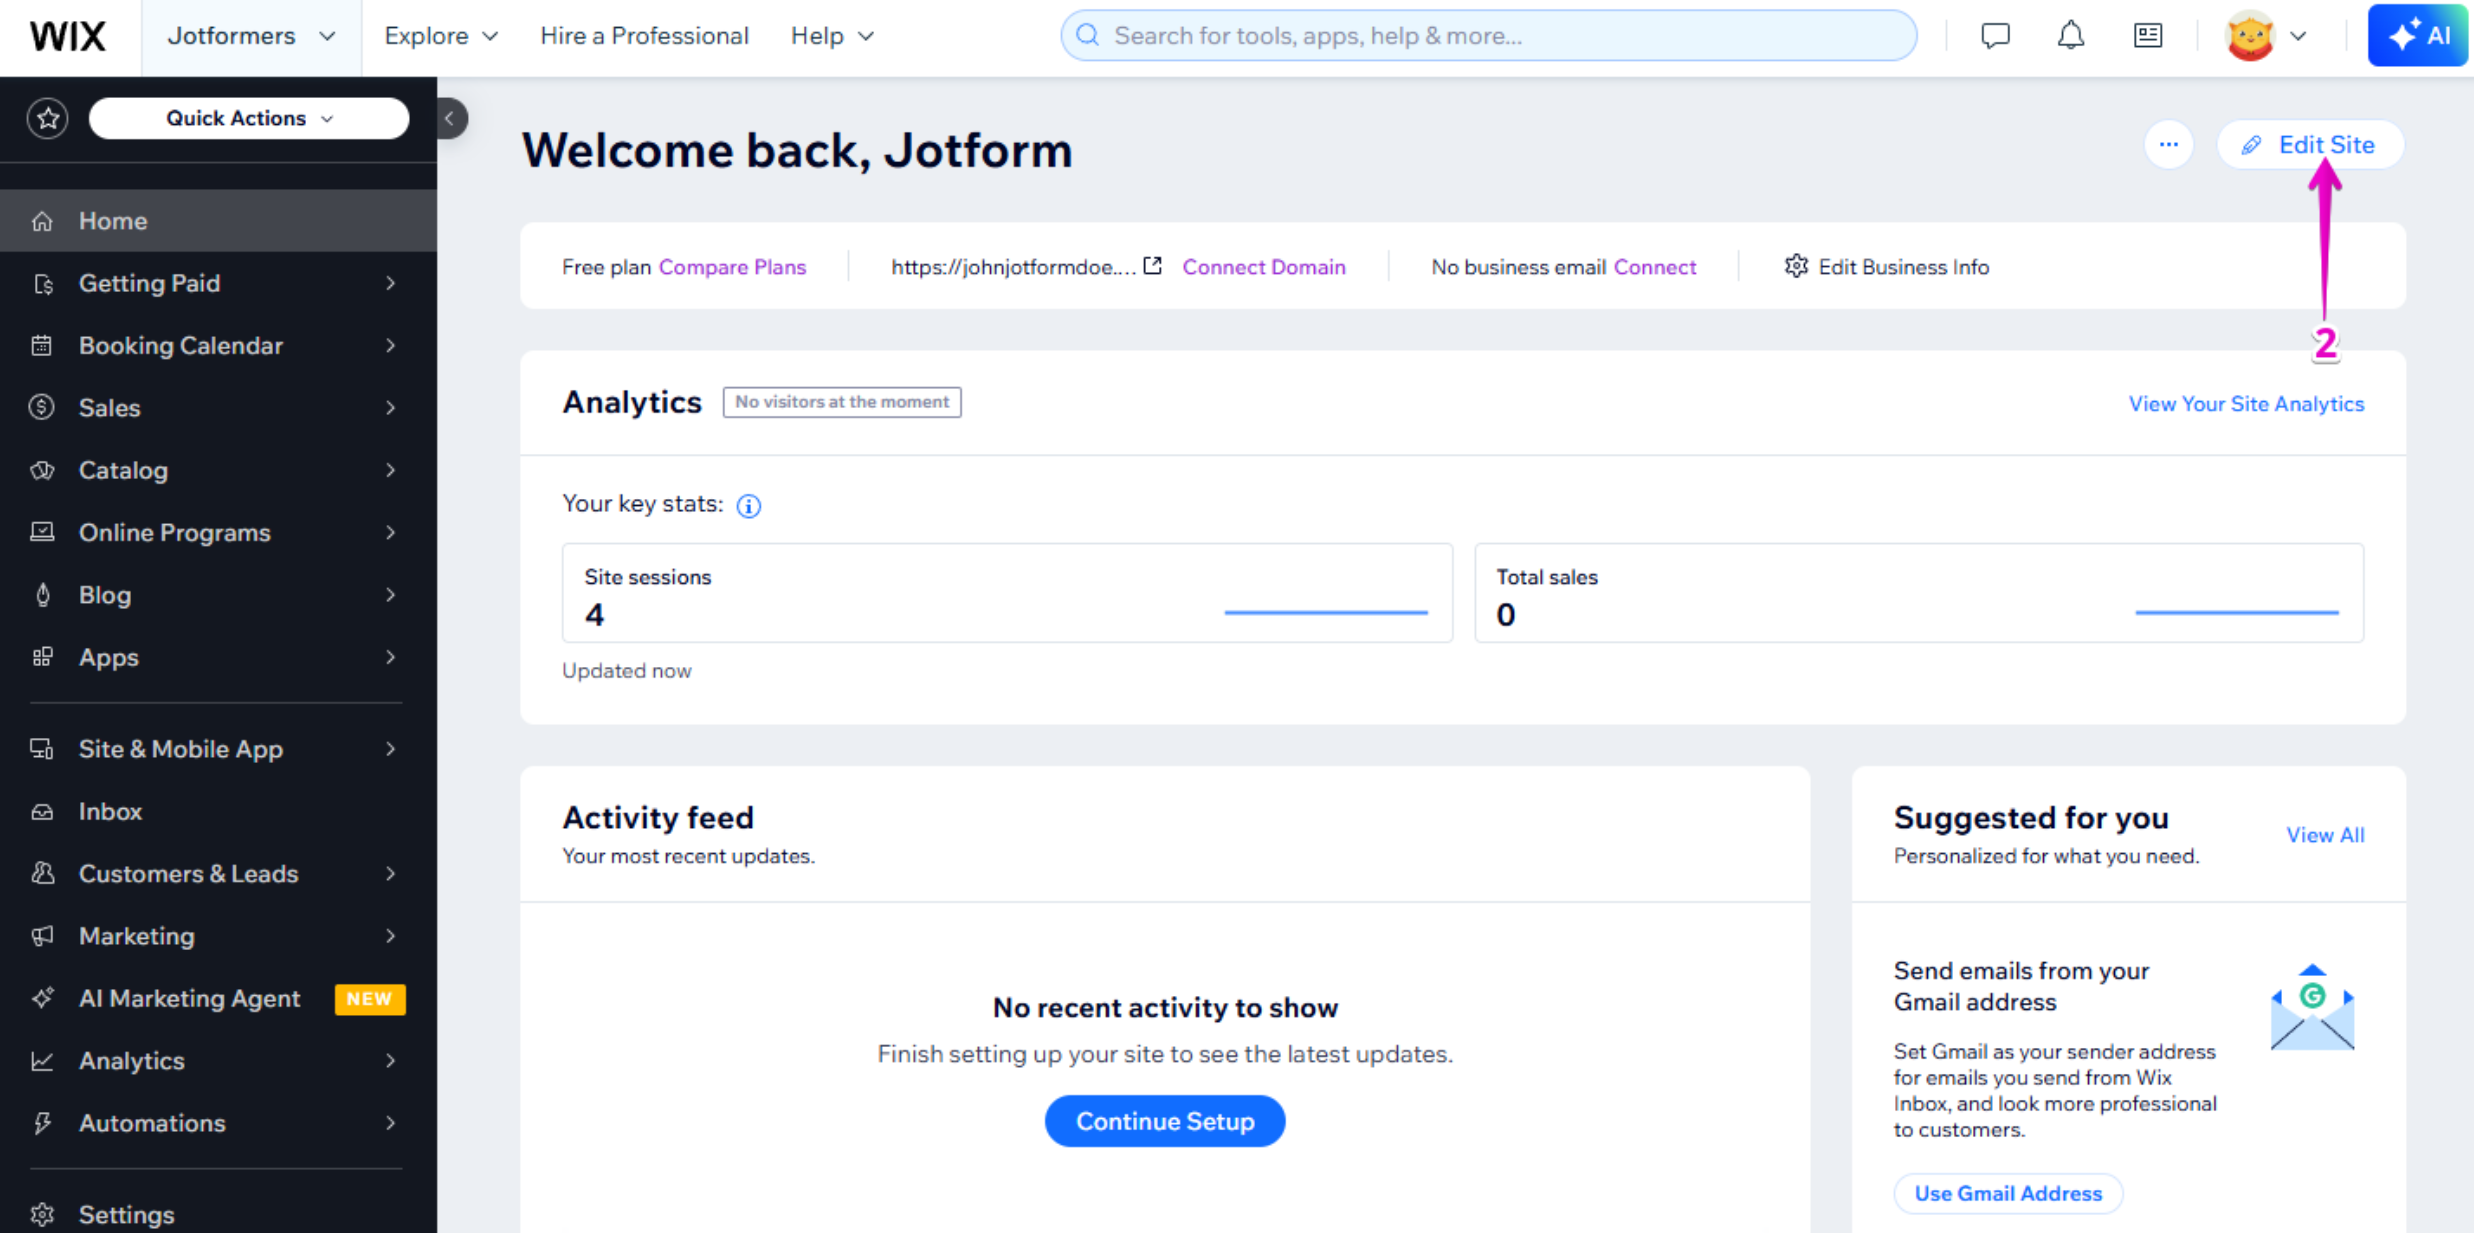
Step 2 — Enter the Website Editor
- Click Edit Site from the left menu or the top-right corner.
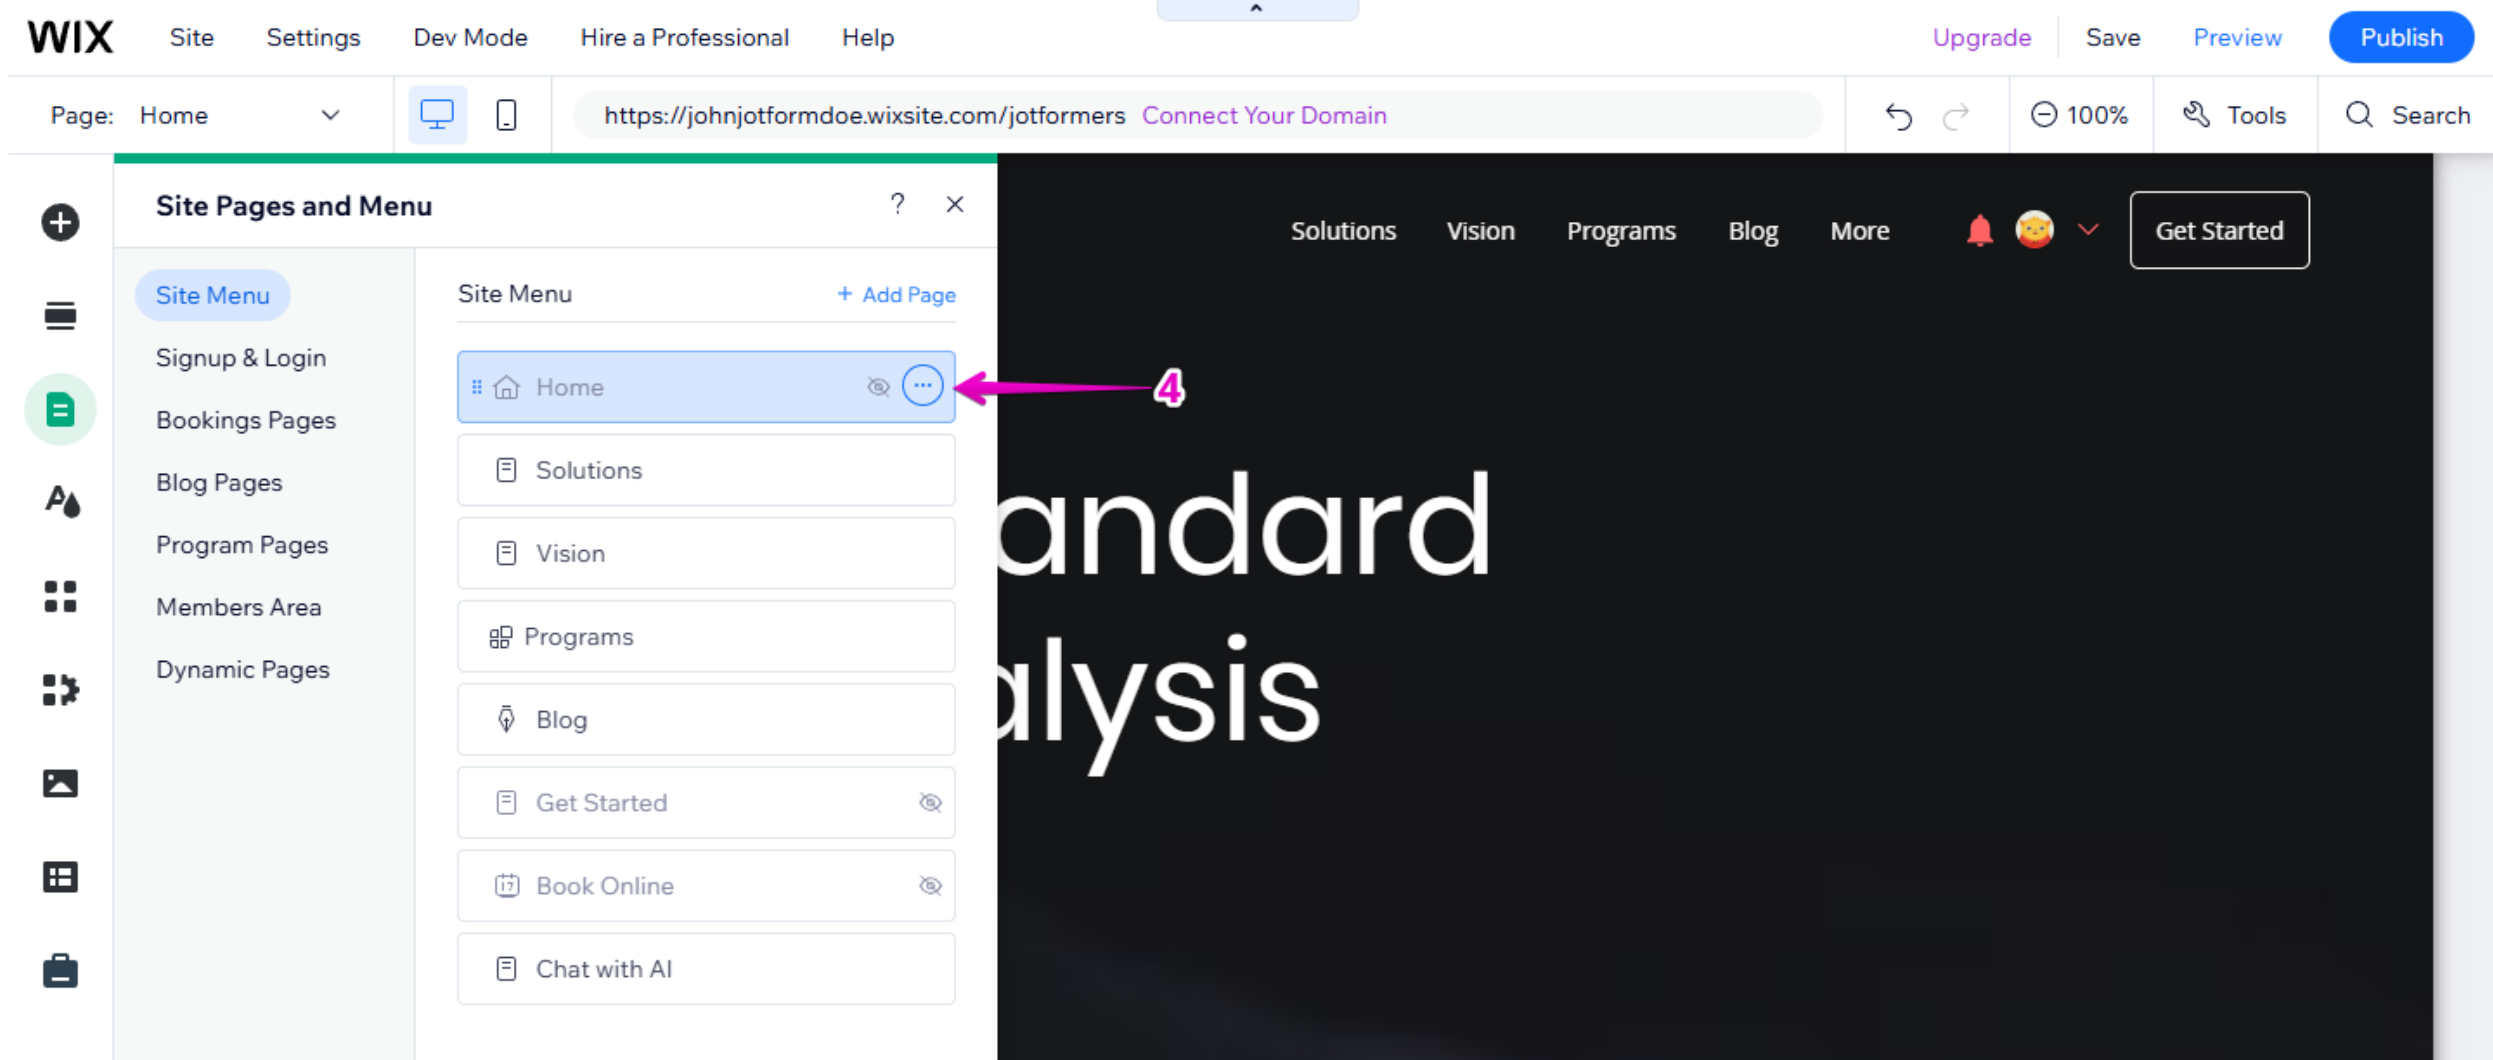
Step 3 — Select the Page
- In the Wix Editor, click Pages & Menu from the left-side menu.
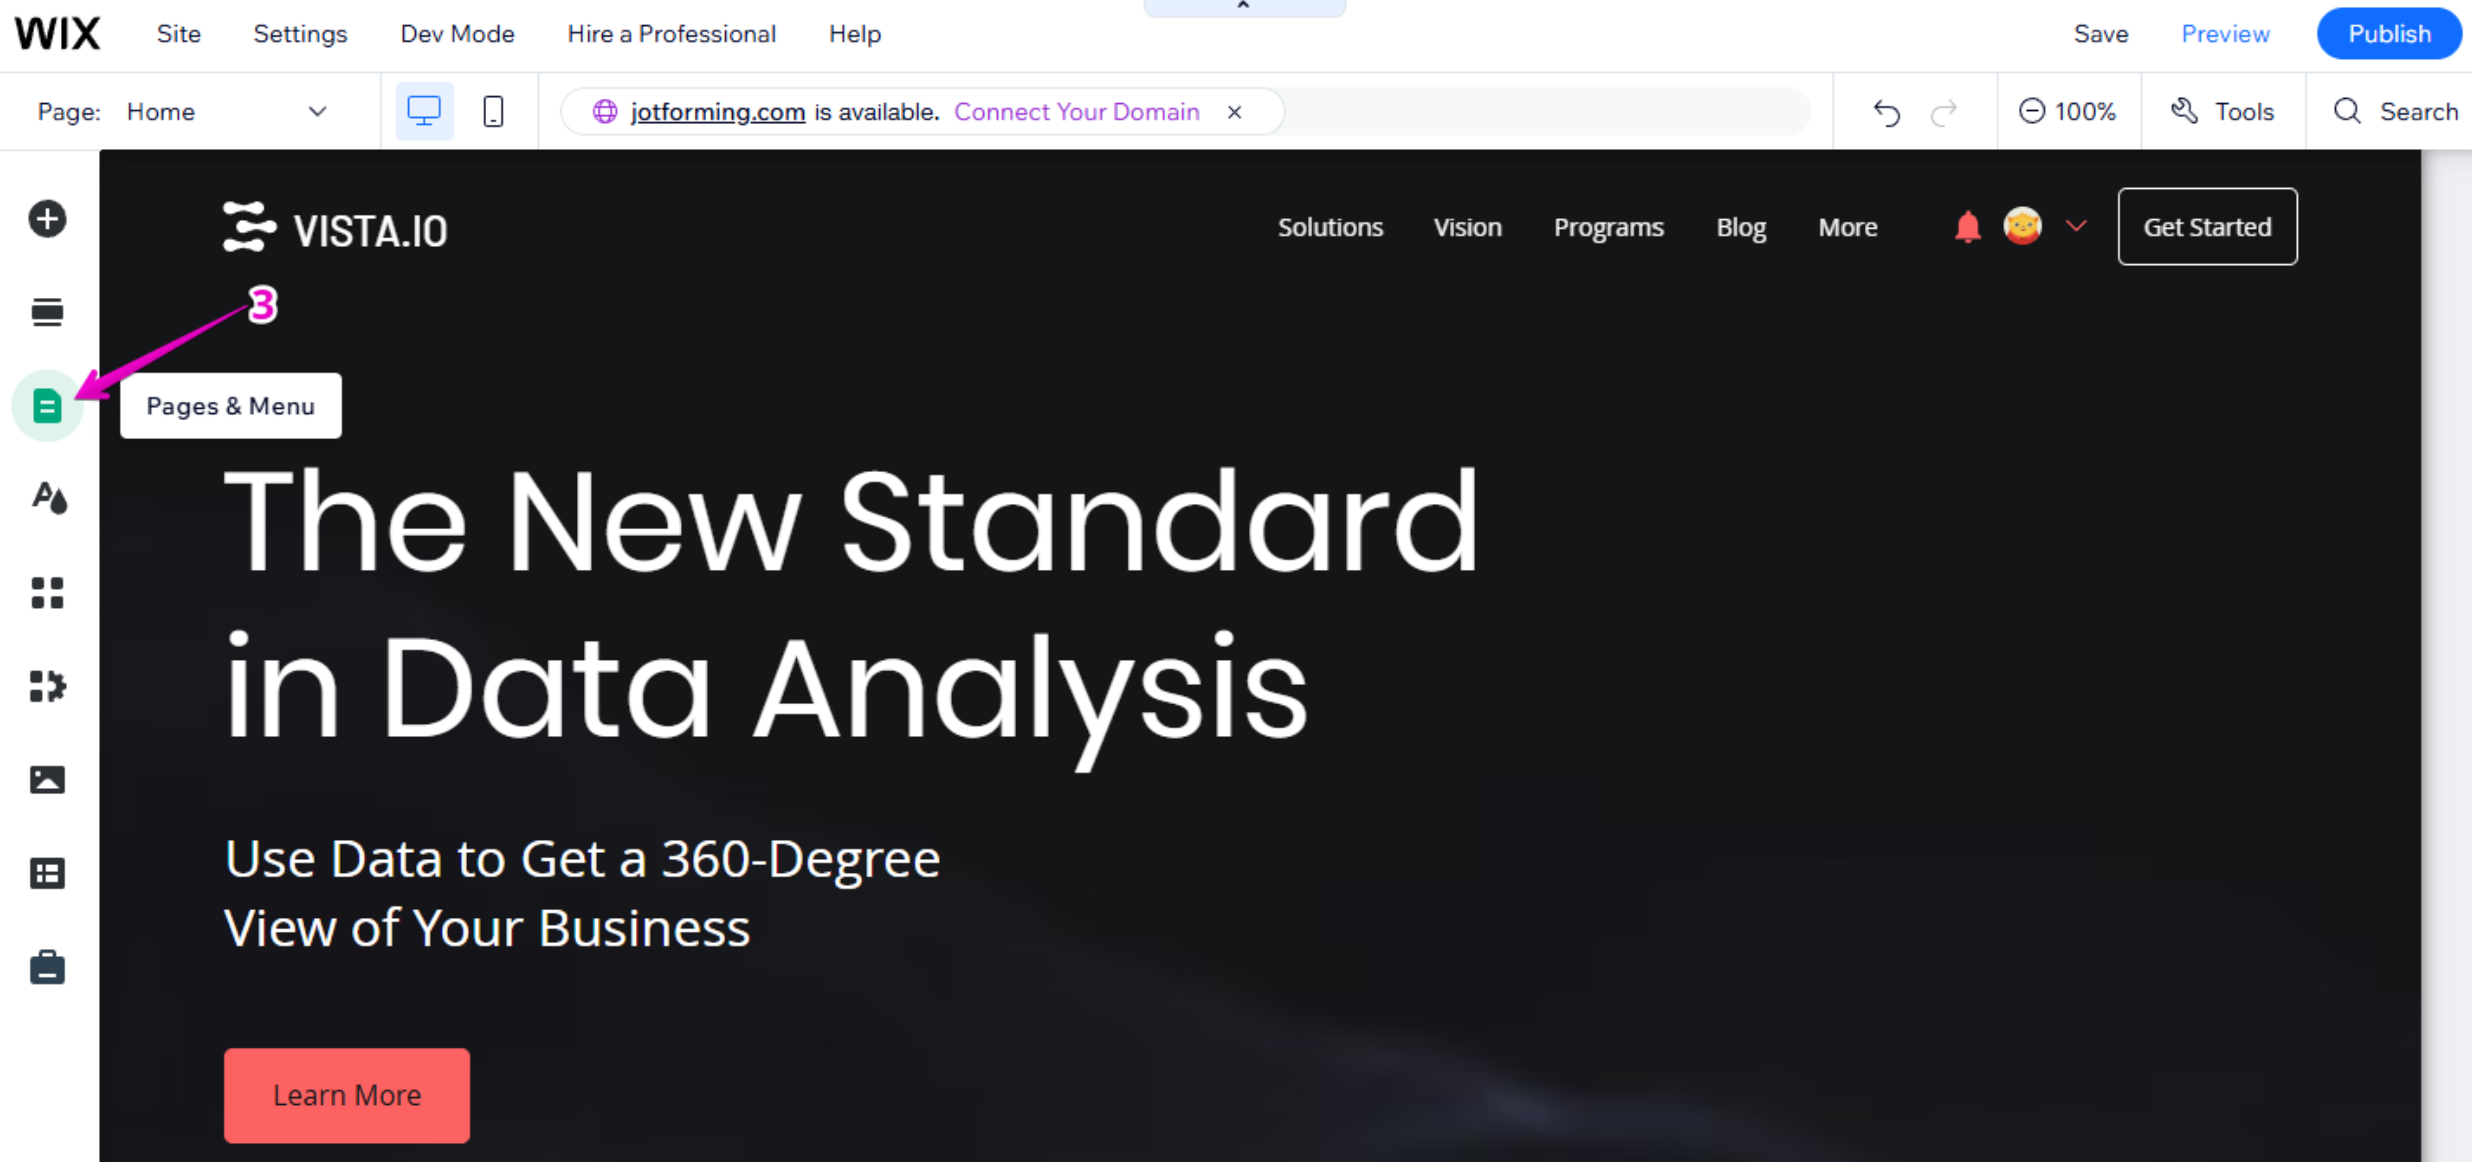
- In the Site Pages and Menu window, select the page where you want the assistant to appear.
Step 4 — Add a New Section
- Hover over the page content area.
- Click Add Section.
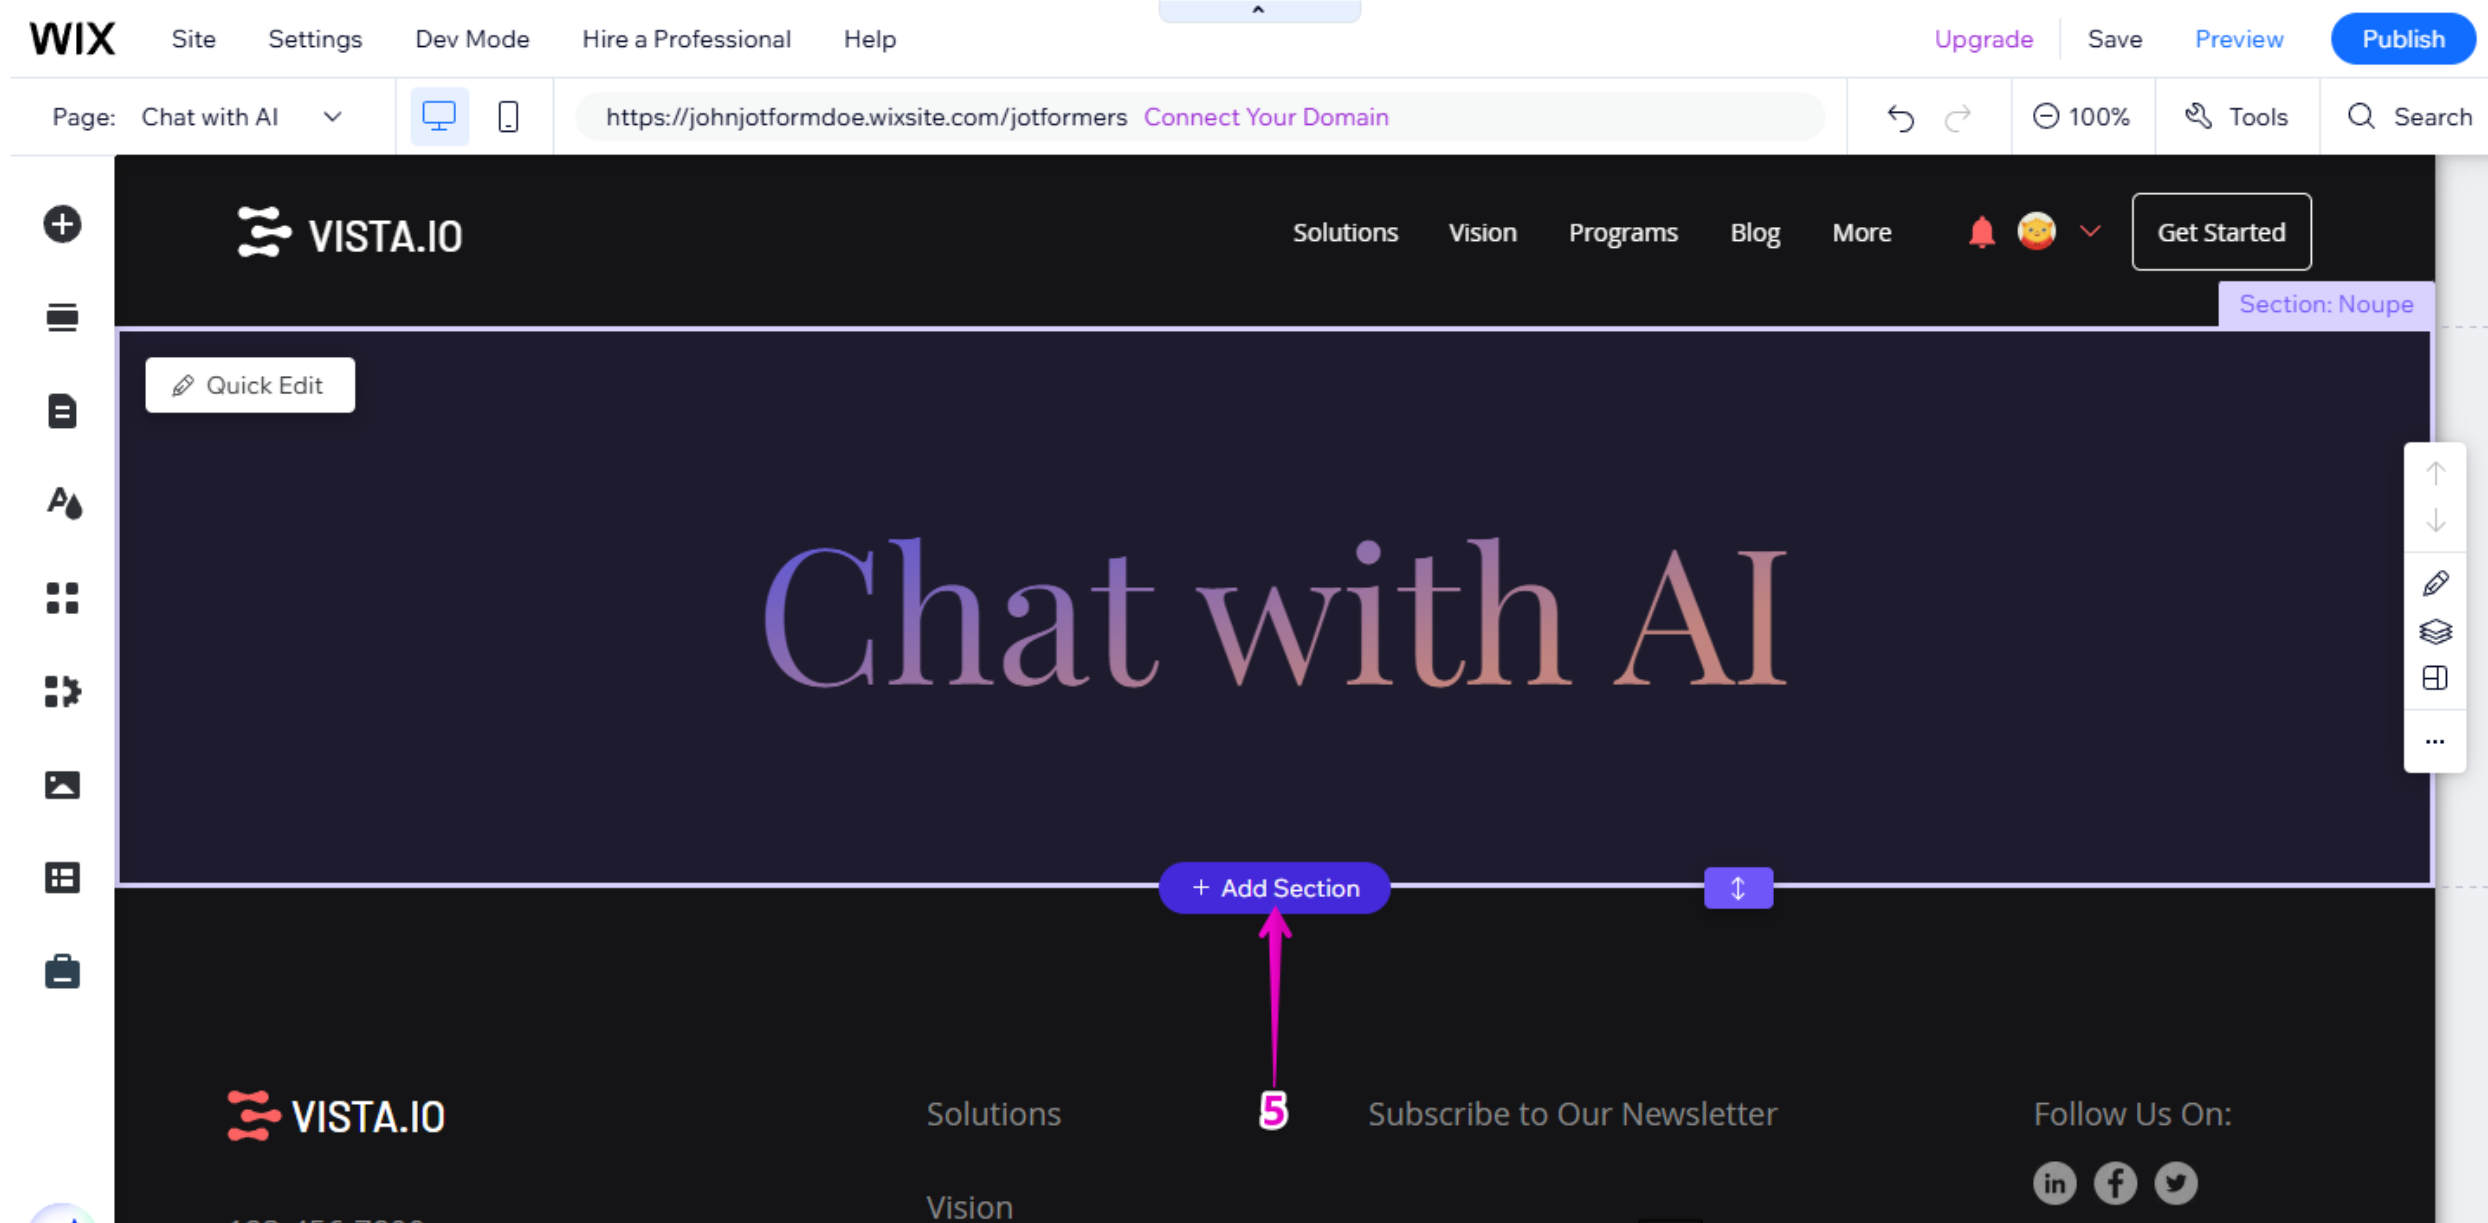
This creates space for the embed element.
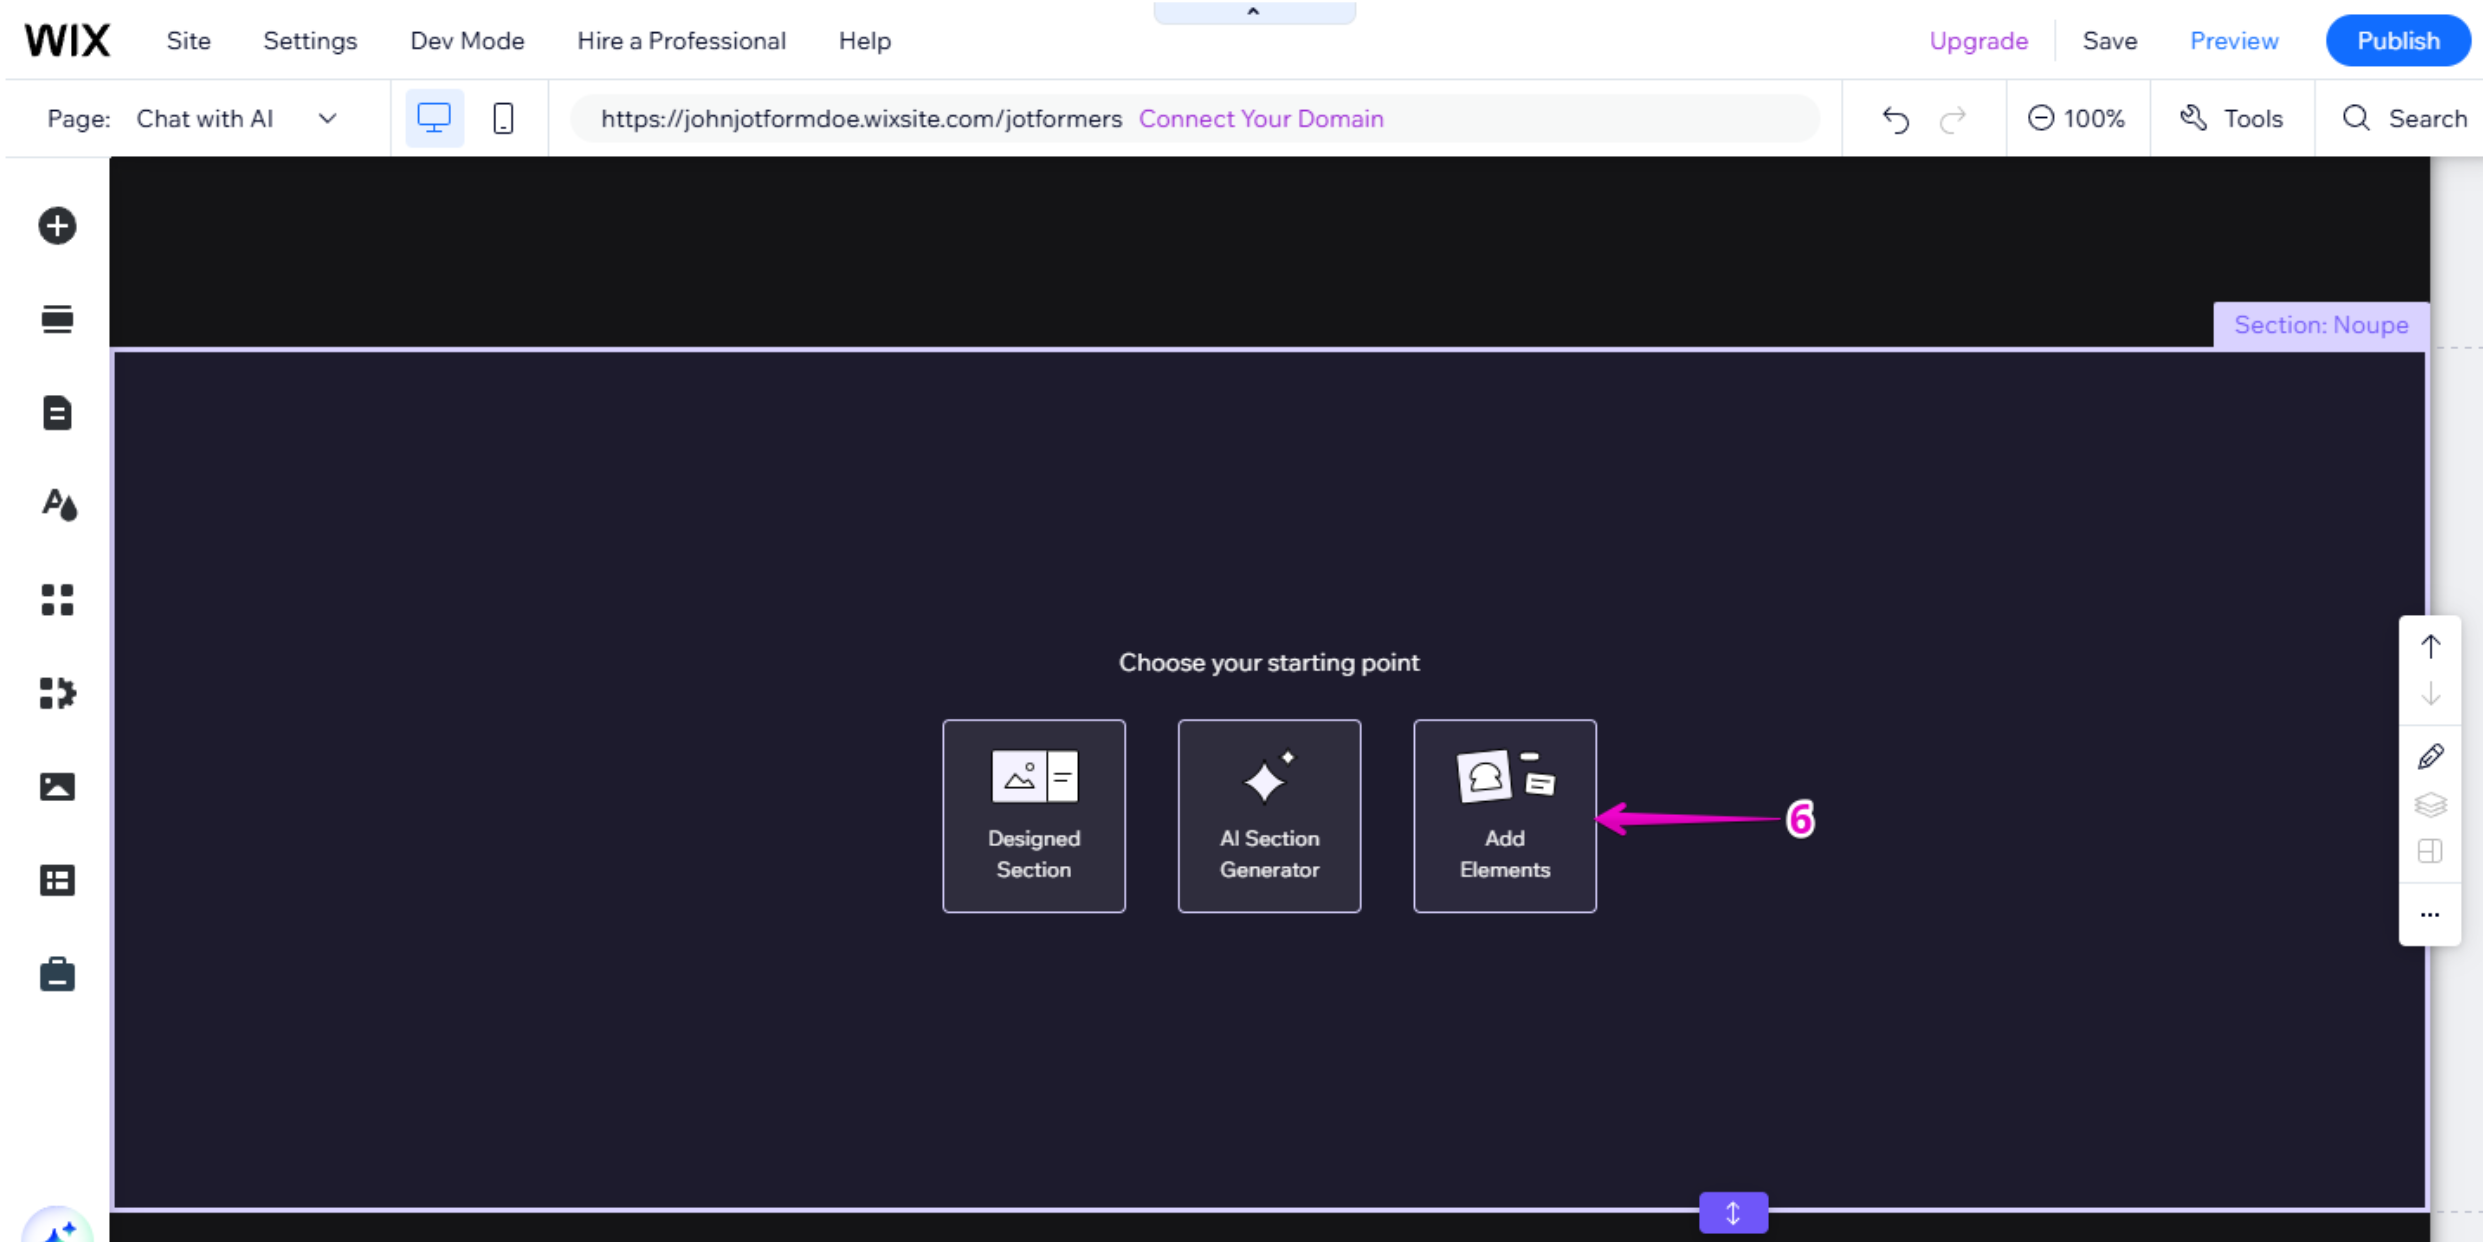
Step 5 — Add the Embed Element
- Inside the new section, click Add Elements.
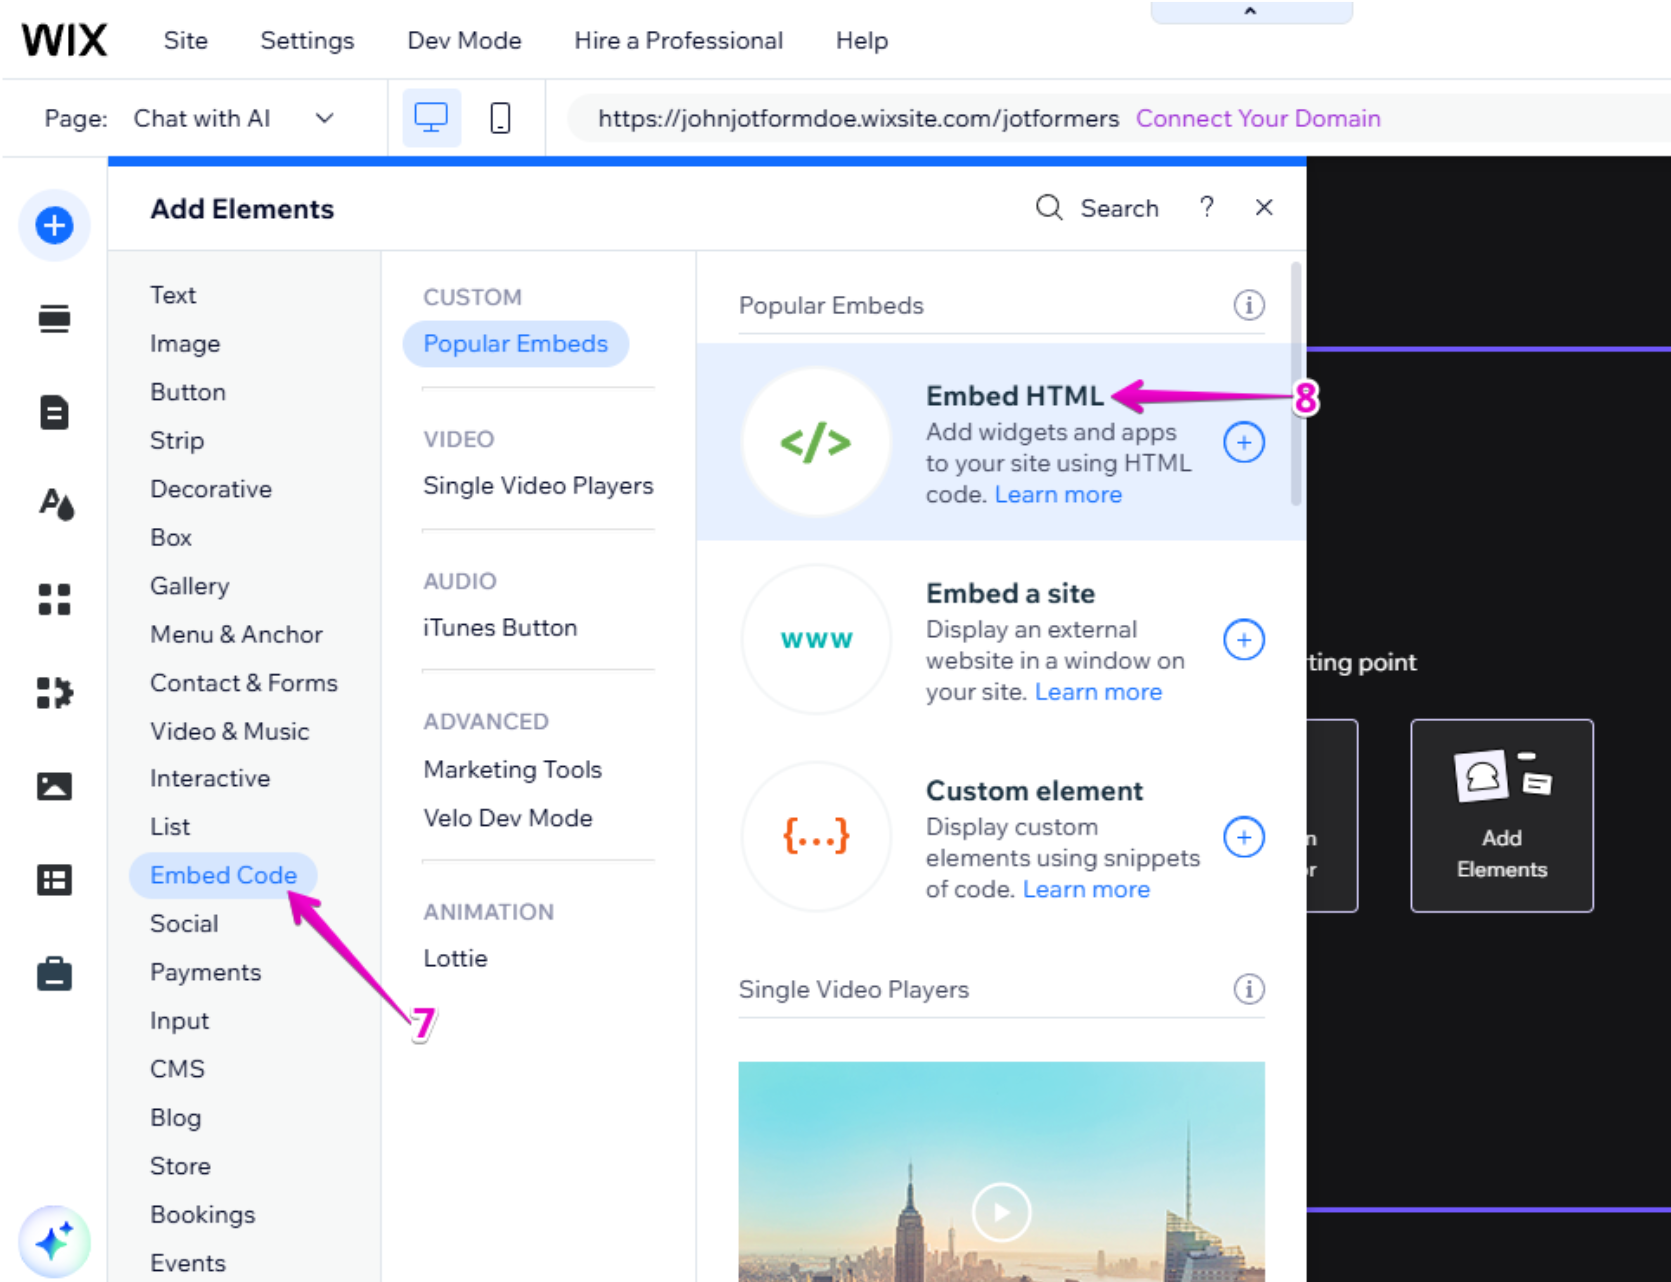
- Click Embed Code.
- Under Popular Embeds, select Embed HTML.
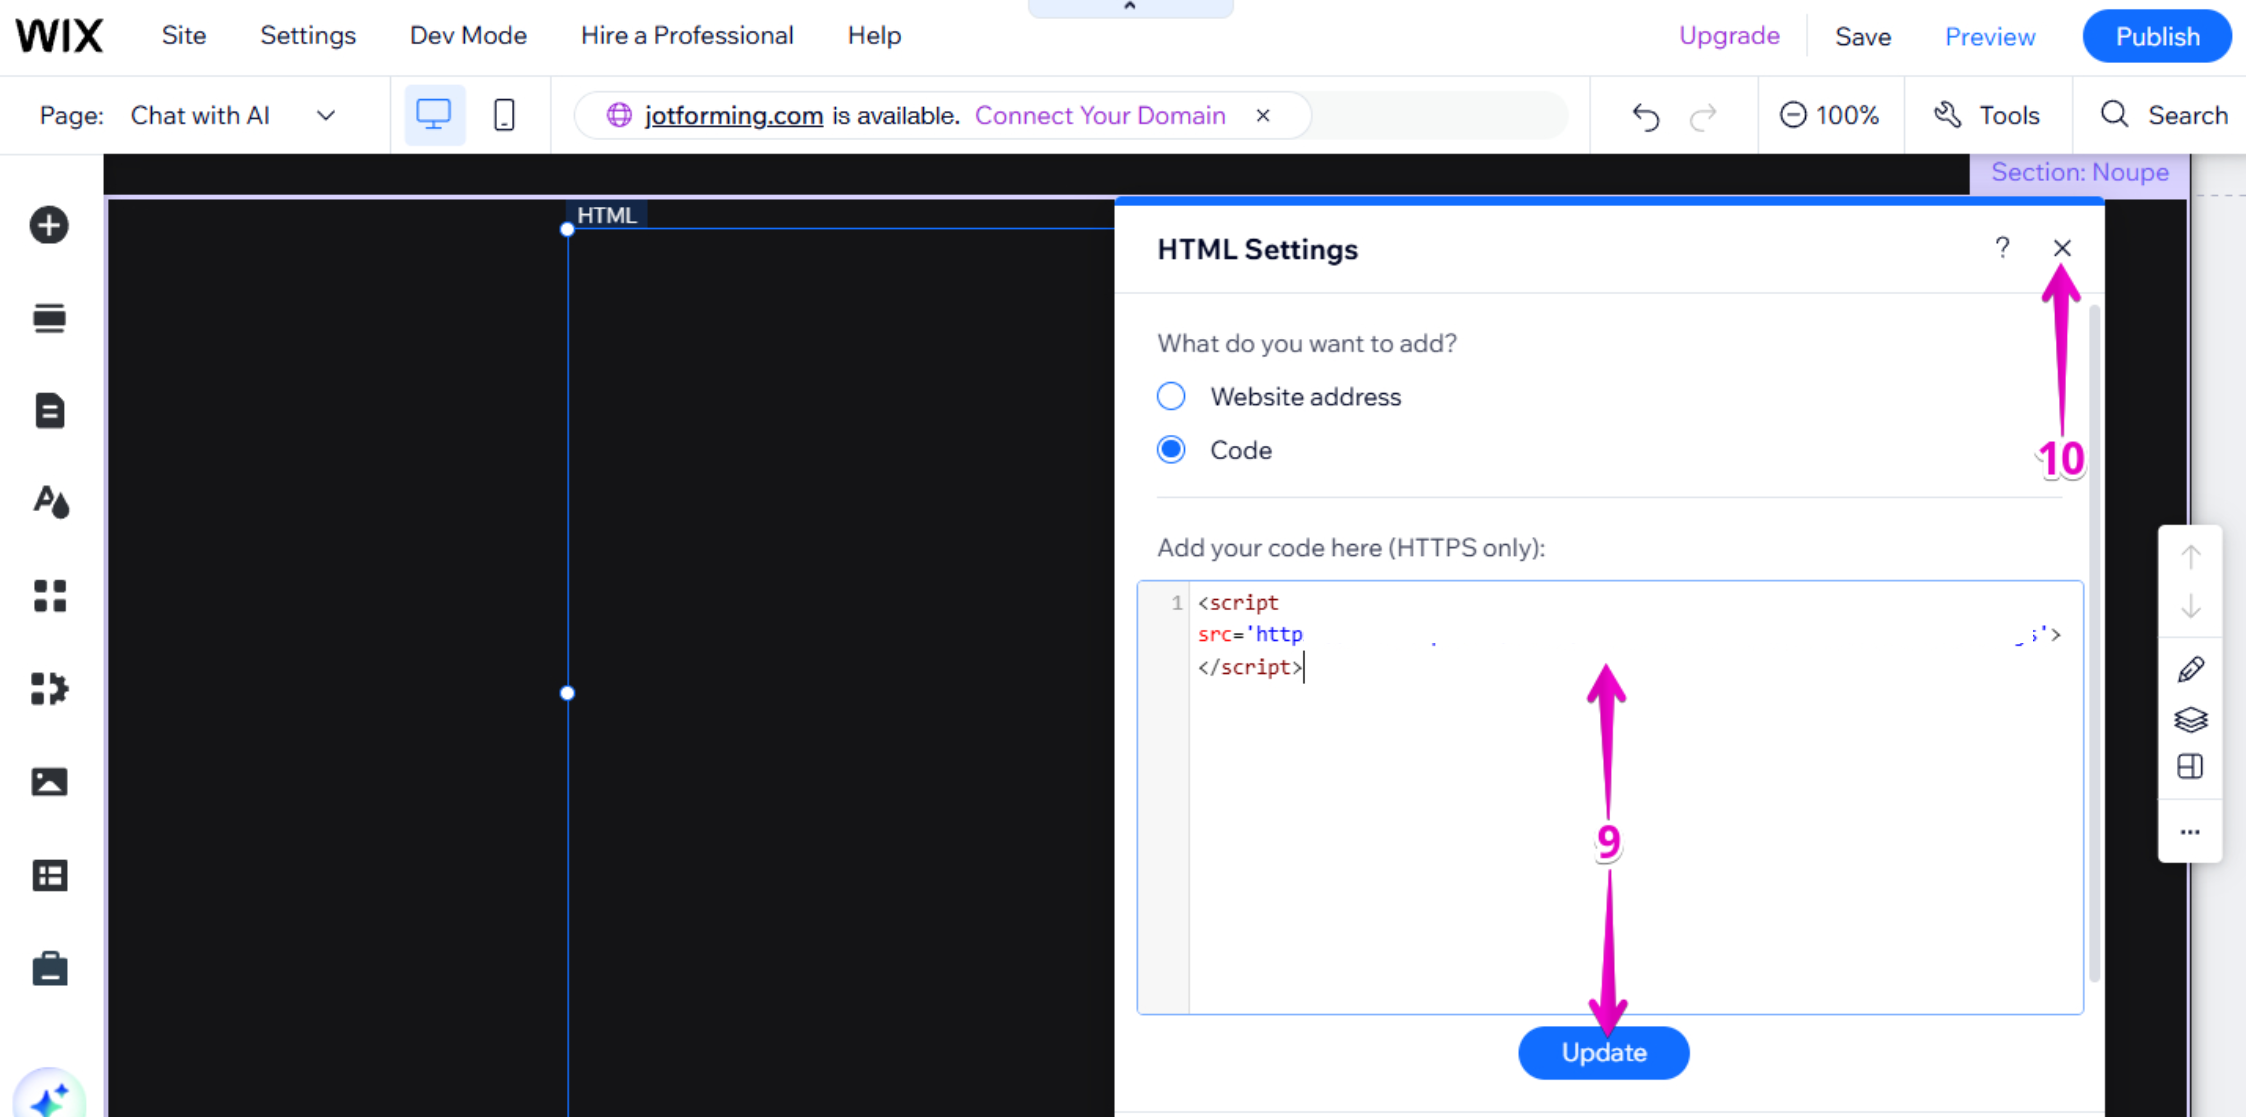
Step 6 — Paste the Embed Code
- Navigate to your Privas AI Domain and copy your Privas AI embed code.
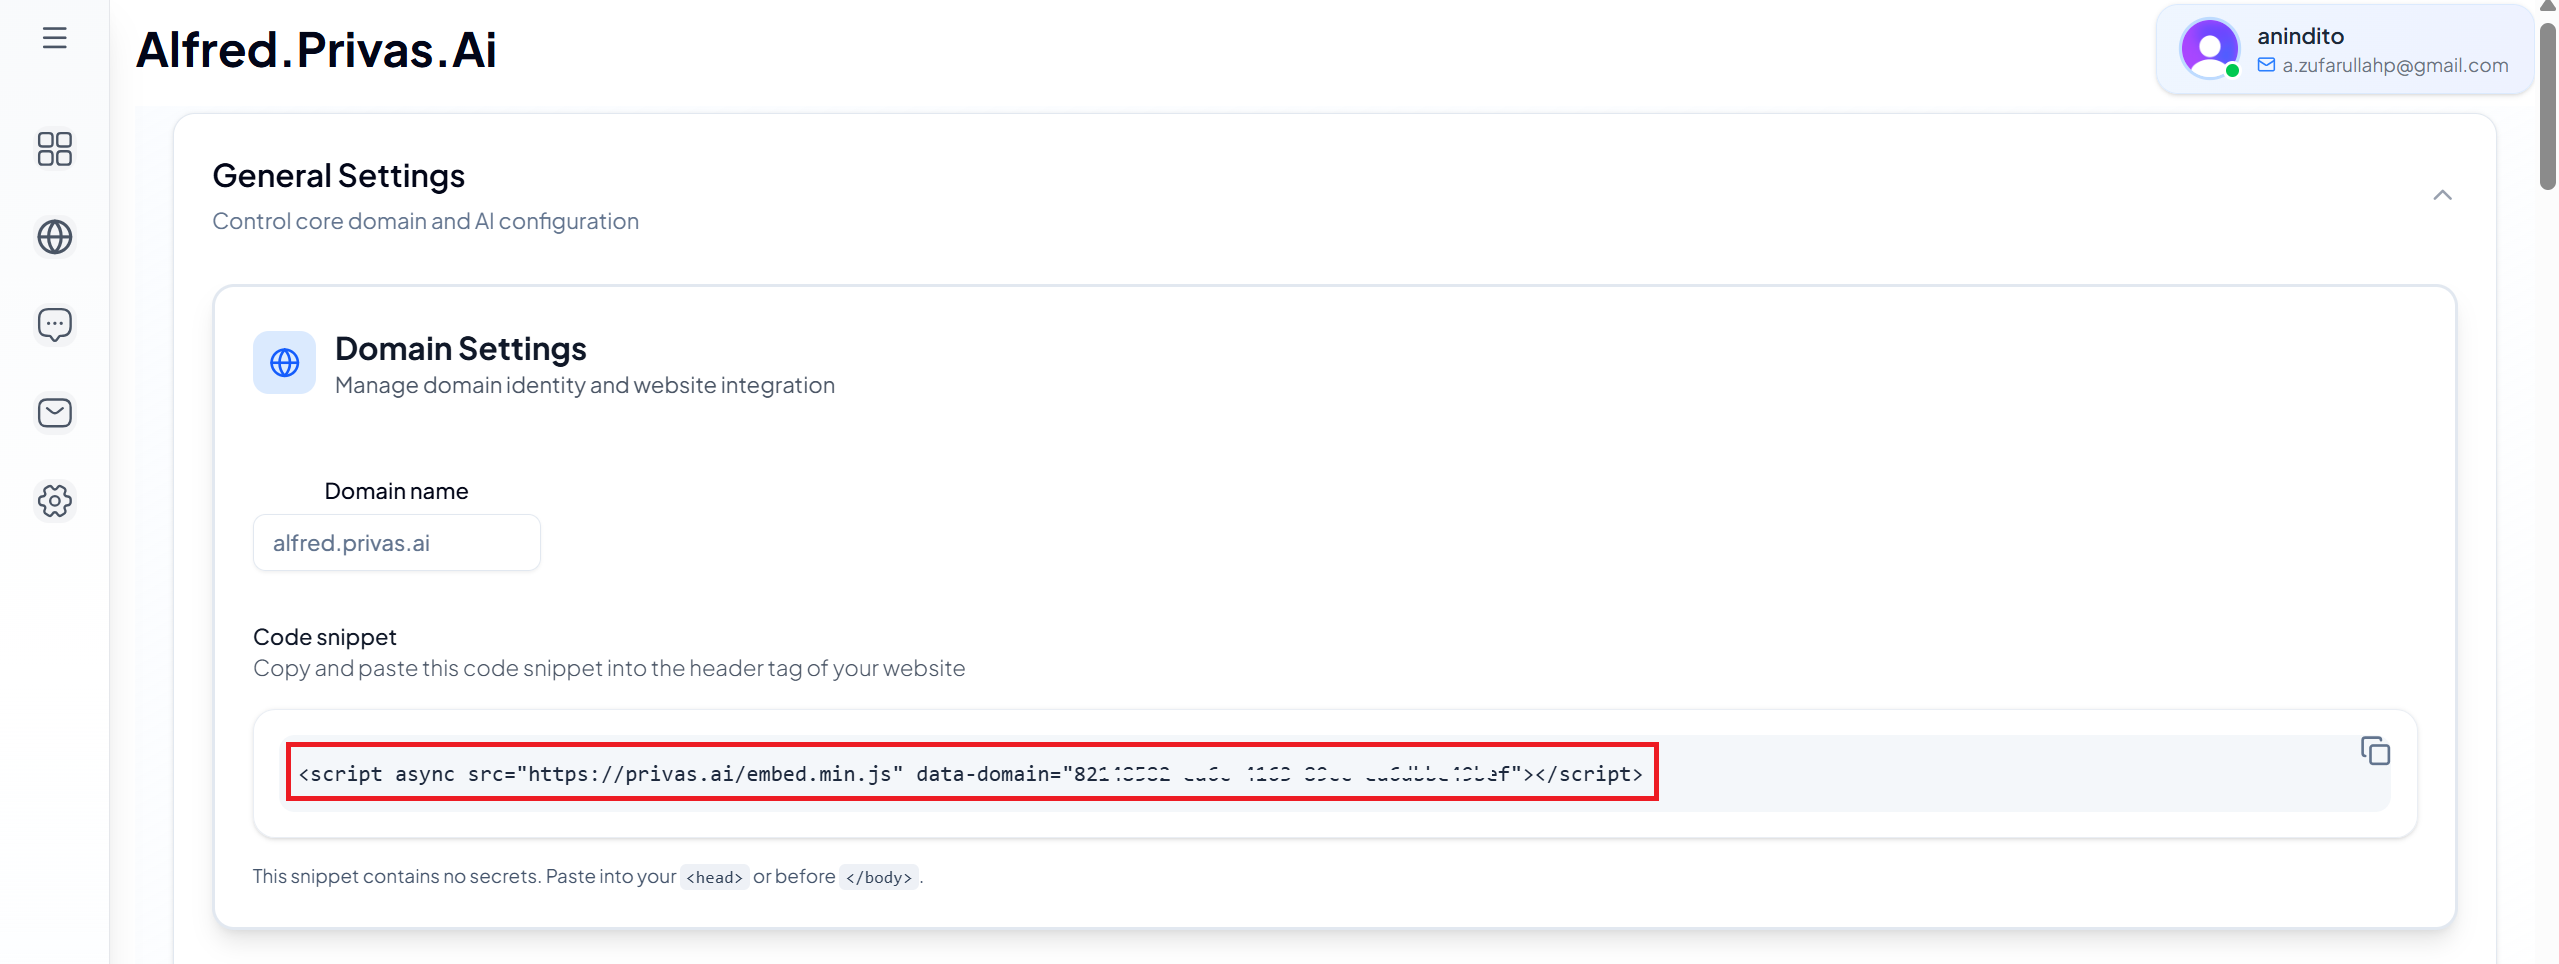
- In the HTML Settings window, locate the field labeled Add Your Code Here (HTTPS Only).
- Paste Privas AI embed code.
- Click Update.
- Click X to close the window.
Step 7 — Publish Your Website
- Click Publish in the top-right corner.
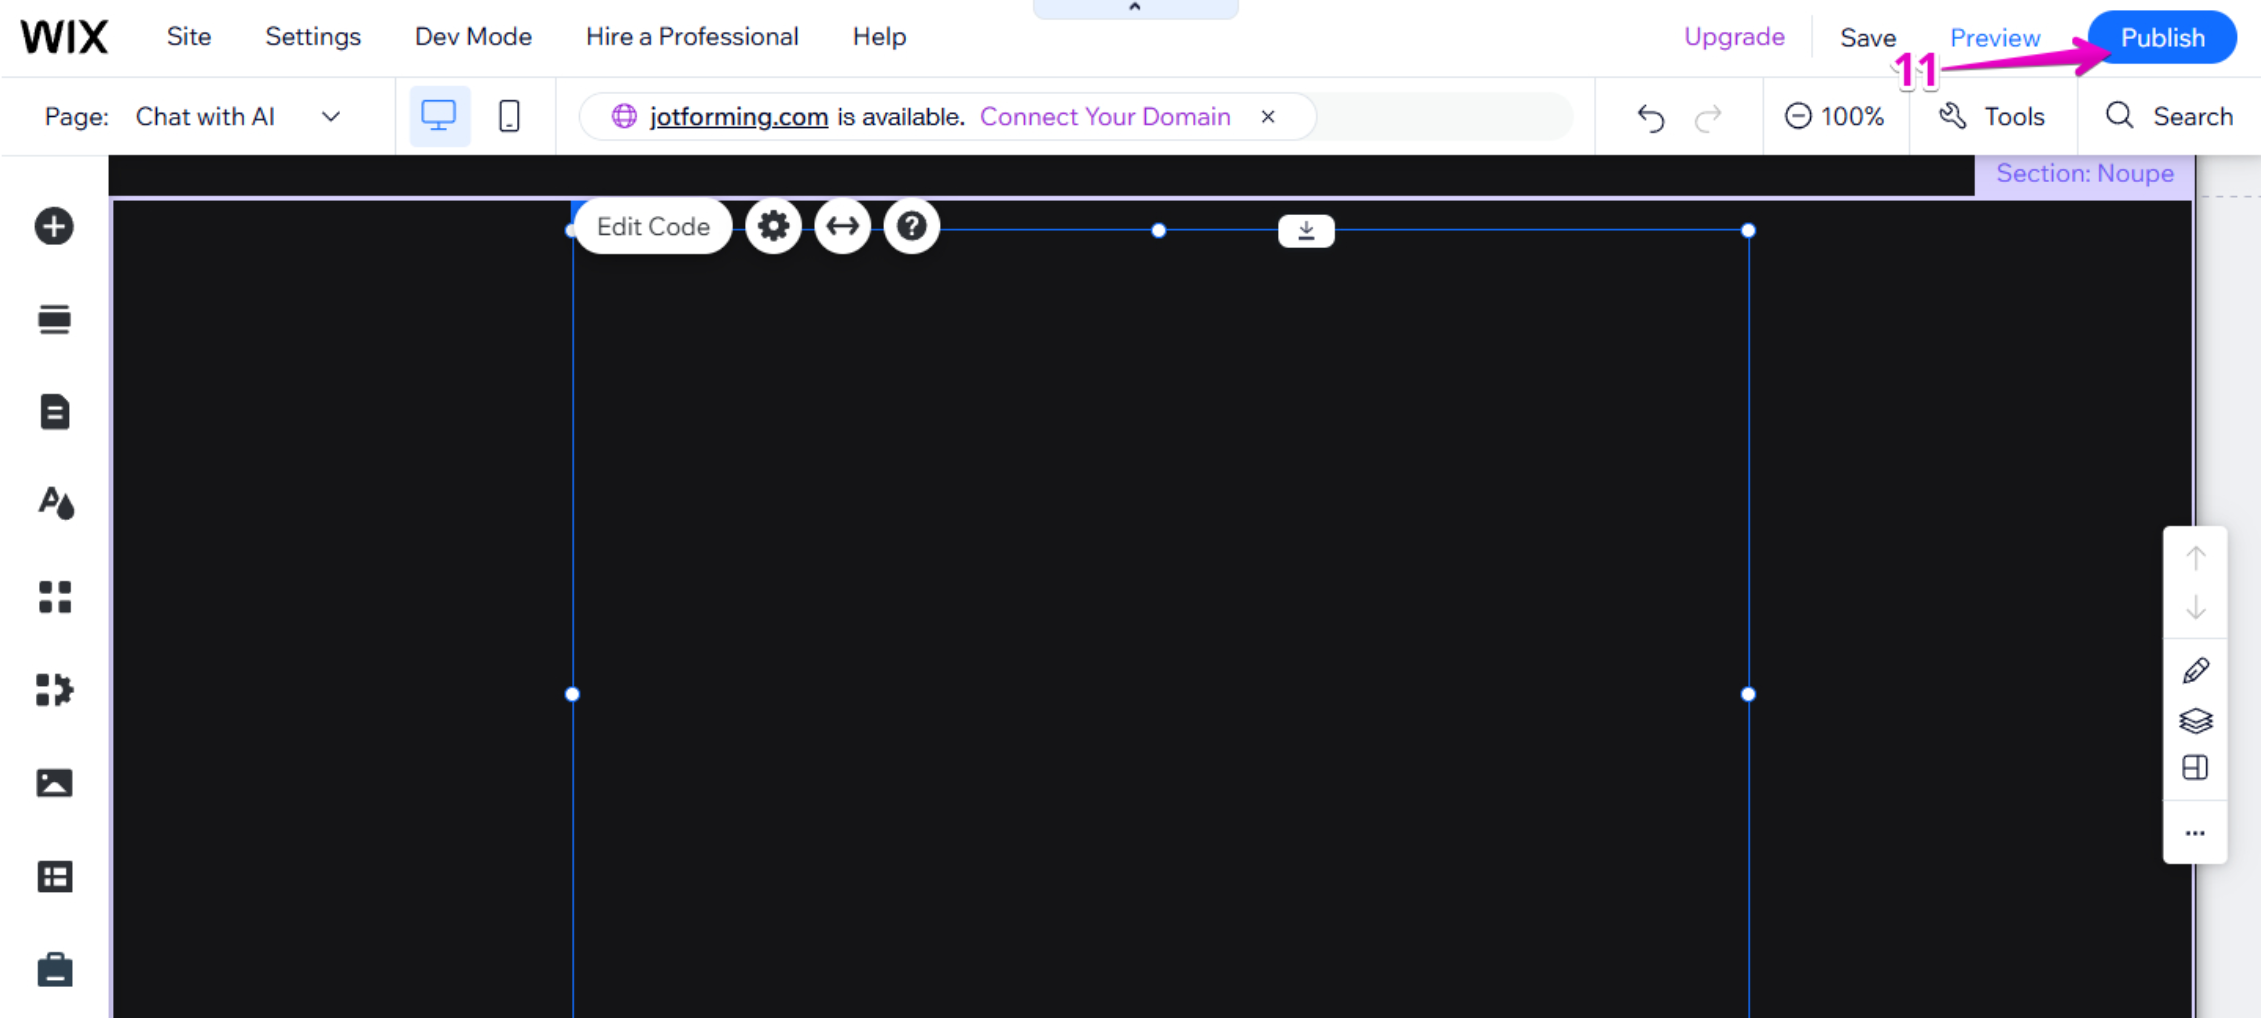
After publishing, visit your website and refresh the page.
You should now see the chat icon appear.
What This Installation Does — and Does Not Do
This installation:
✔ Displays your assistant on the selected page
✔ Loads securely
✔ Works independently from your Wix tools
It does NOT:
✘ Modify your website design
✘ Change your navigation structure
✘ Affect forms, bookings, or eCommerce
✘ Access external data
The widget simply connects your Wix page to your configured Privas AI domain.
If the Widget Does Not Appear
- Make sure you clicked Publish
- Refresh the page
- Confirm the full embed code was pasted correctly
- Ensure it was added as Embed HTML
Optional — Show the Assistant on All Pages (Global Install)
If you want the assistant to appear across your entire Wix website, you can install it globally using Wix’s custom code feature.
Why this matters
This method makes the assistant available on every page, so visitors can access it anywhere.
It affects the whole site (all pages).
It does not change your design, page content, SEO settings, or Wix business features.
Step 1 — Copy the Privas AI Embed Code
- Open your Privas AI Domain Dashboard.
- Copy your Website Widget Embed Code.
Step 2 — Open Wix Custom Code Settings
- Log in to your Wix Dashboard.
- Select the site you want to edit.
- Go to Settings.
- Find and open Custom Code (sometimes labeled Custom Code & Tracking).
Step 3 — Add a New Custom Code Snippet
- Click Add Custom Code.
- In the code box, paste your Privas AI embed code.
Step 4 — Choose Where the Code Loads
- Set Place Code in to Head (recommended).
- Set Load code on to All pages.
This ensures the widget loads site-wide and remains consistent.
Step 5 — Apply and Publish
- Click Apply or Save.
- Click Publish to make the changes live.
After publishing, open your website and refresh the page.
You should now see the chat icon on every page.
What this affects (and what it does not)
This setup:
- shows the assistant on all pages
- loads automatically for visitors
It does not:
- modify page layout or theme
- change navigation or menus
- affect Wix bookings, stores, or forms
If the widget still does not appear
- Confirm the code is set to load on All pages
- Confirm it is placed in Head
- Clear browser cache and refresh
- Make sure you published the site after saving
Next Step
Continue to Test the Representative.
Before announcing it publicly, confirm that your assistant represents your business clearly and accurately.