D. Widget Integration
Install Privas AI on Blogger
Embed the AI representative on Blogger
By aninditoUpdated 4 Mar 2026
Blogger allows you to embed external scripts or components.
You can add the Privas AI representative by inserting the Privas embed script.
This guide explains how to install the Privas AI widget on a Blogger website.
Why this matters
Embedding the assistant in Blogger:
- Makes your AI representative available to visitors
- Keeps communication consistent
- Does not require editing your theme files
This affects only the page where you paste the embed code.
It does not modify your layout template, SEO settings, or blog posts.
Before You Start
Make sure you have:
- Access to your Blogger account
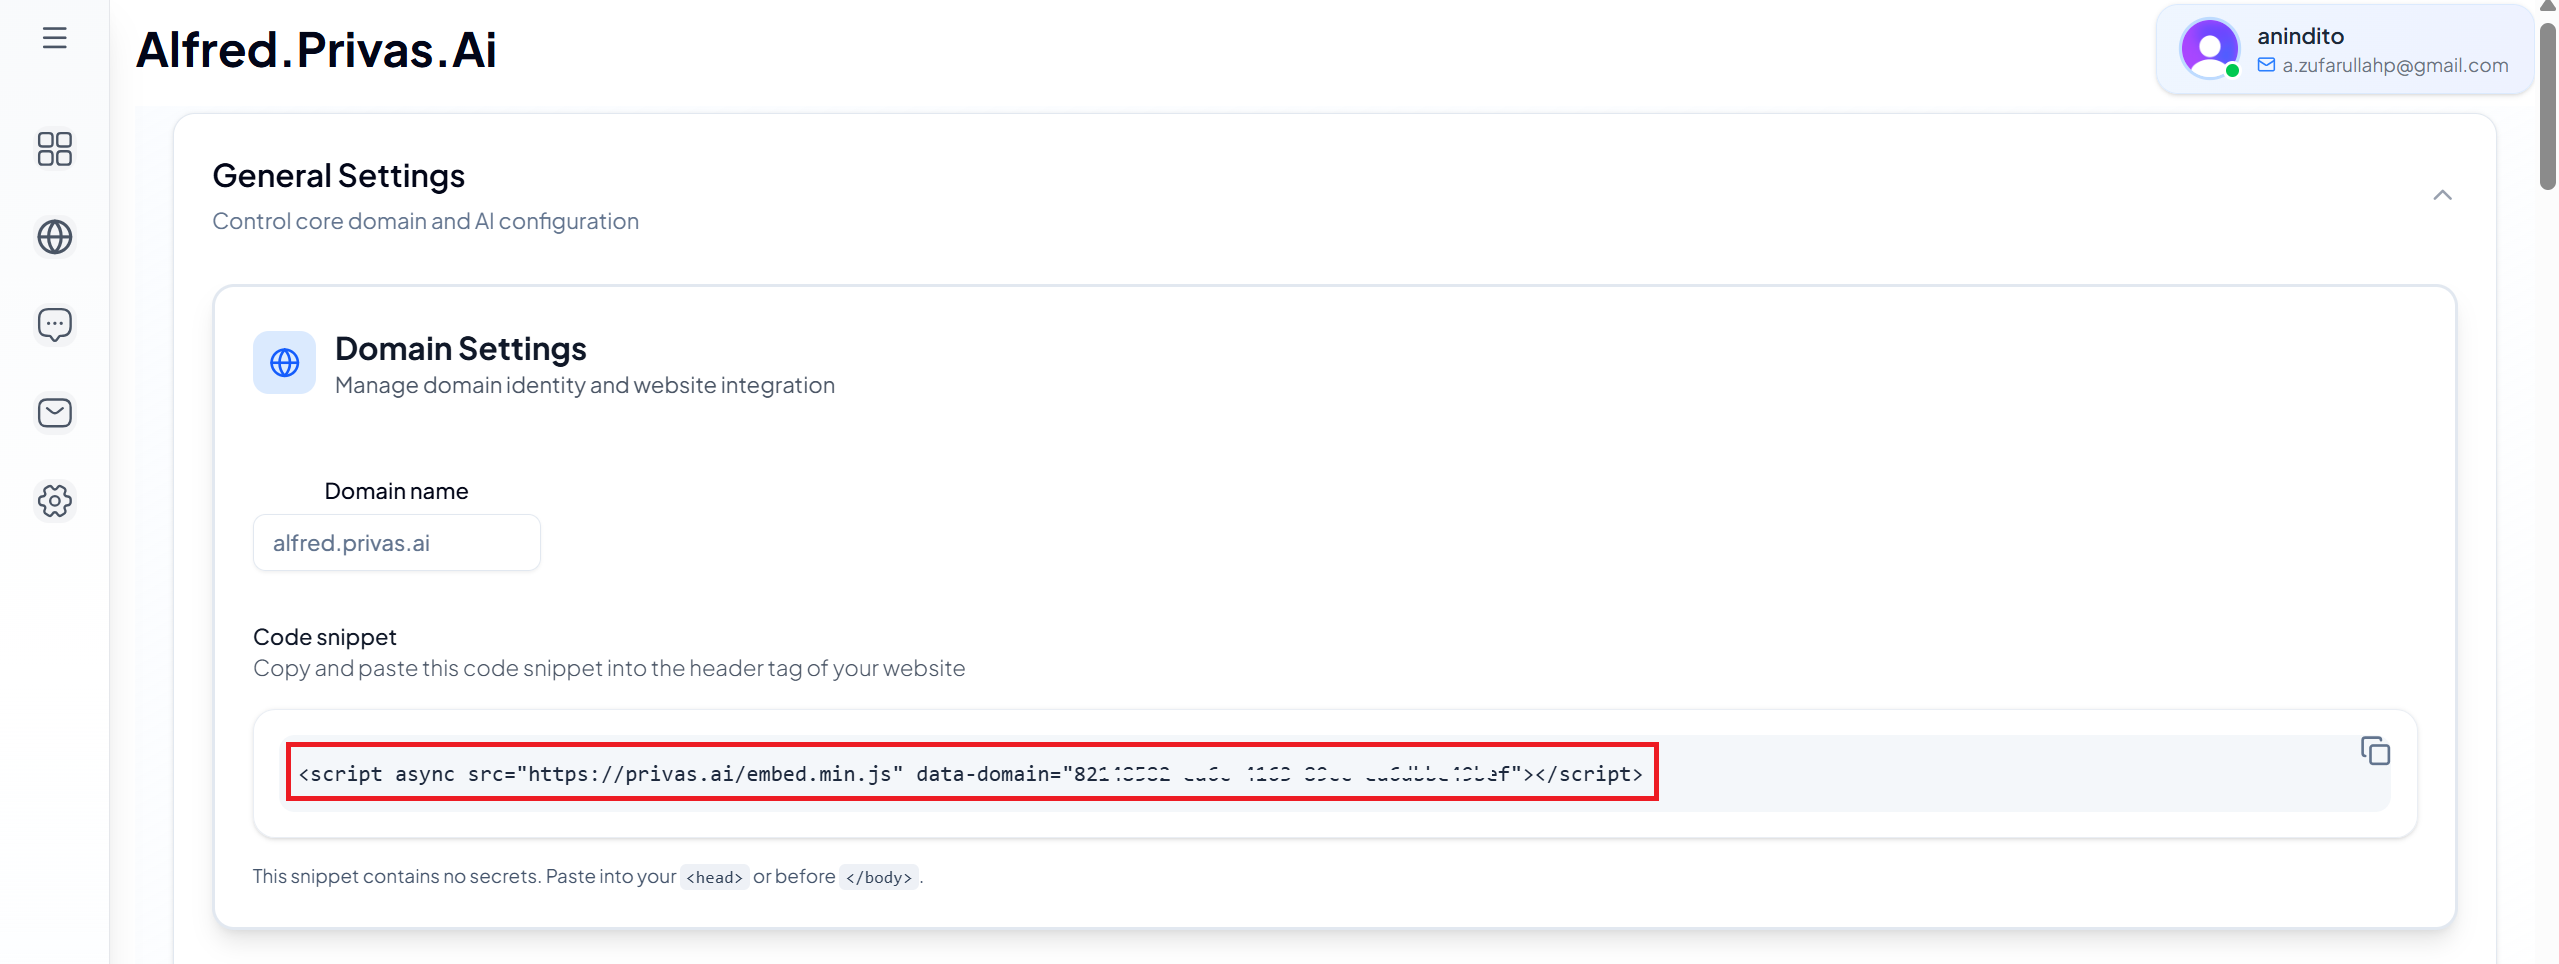
- Your Privas AI Website Widget Embed Code
You can copy the embed code from your Privas AI Domain Dashboard.
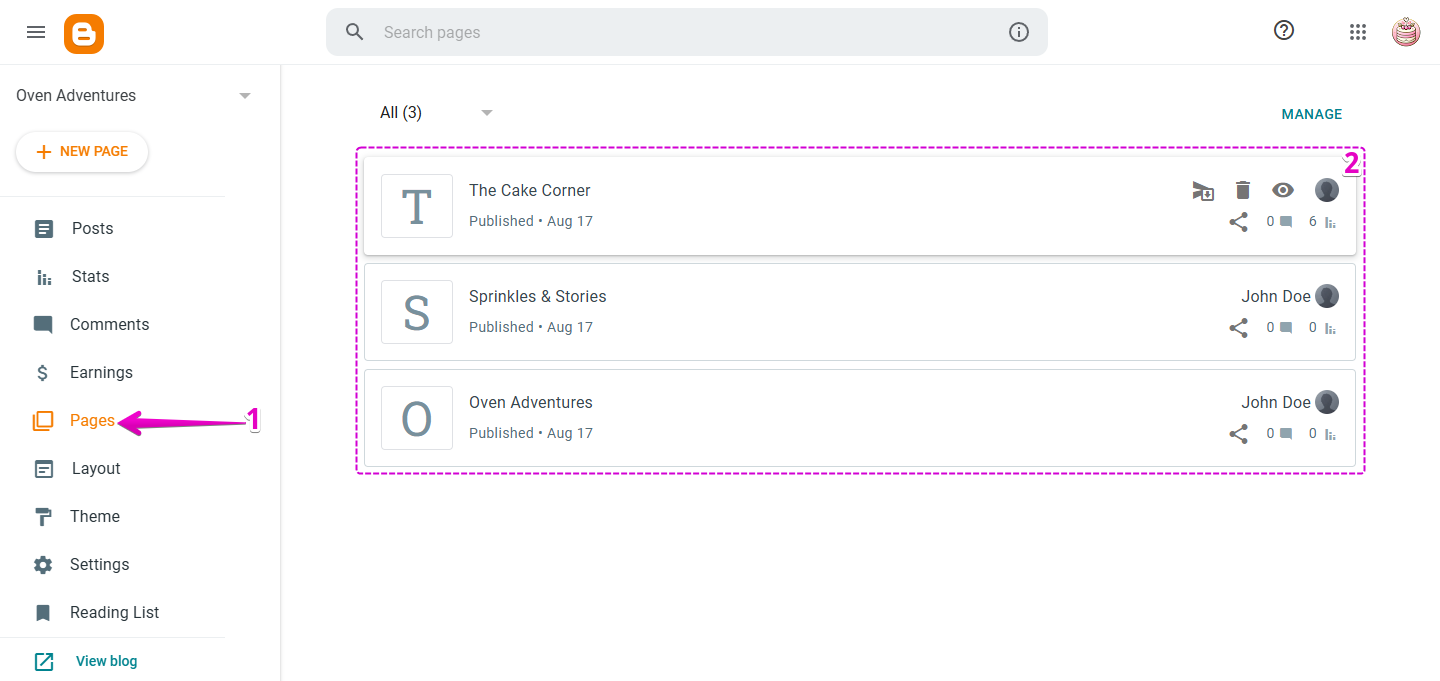
Step 1 — Open Your Pages Section
- Log in to your Blogger Account.
- In the left menu, click Pages.
- From the list on the right, select the page where you want to add the assistant.
Step 2 — Switch to HTML View
- In the Page Editor toolbar, click the Pencil icon.
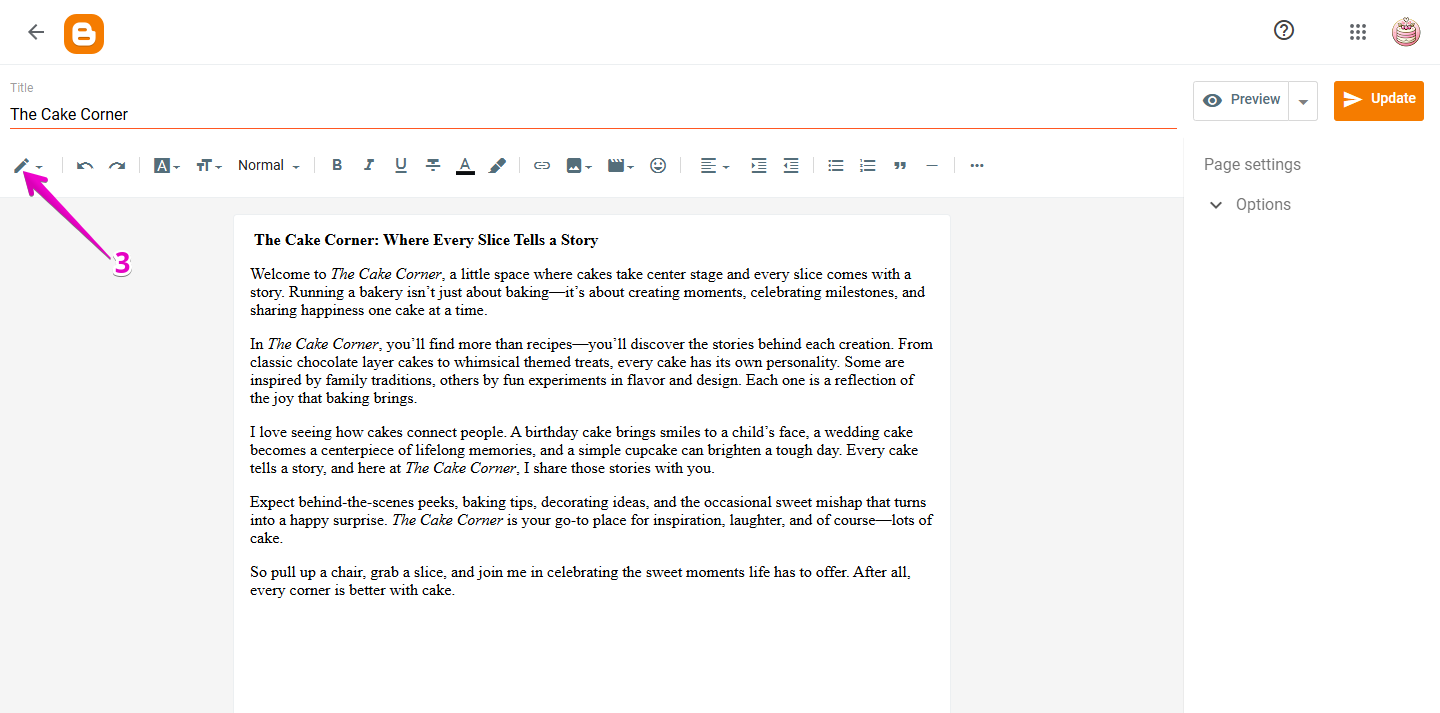
- From the dropdown menu, select HTML View.
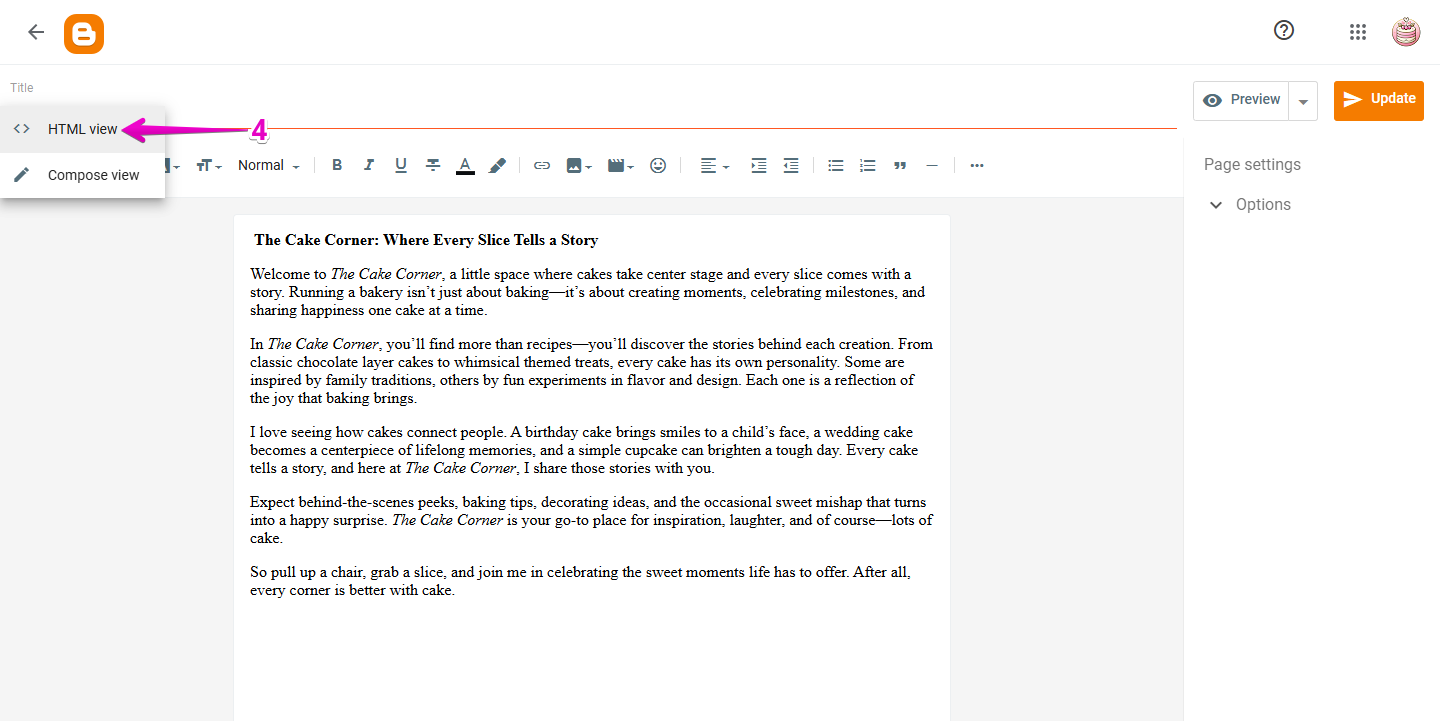
This allows you to paste the embed script correctly.
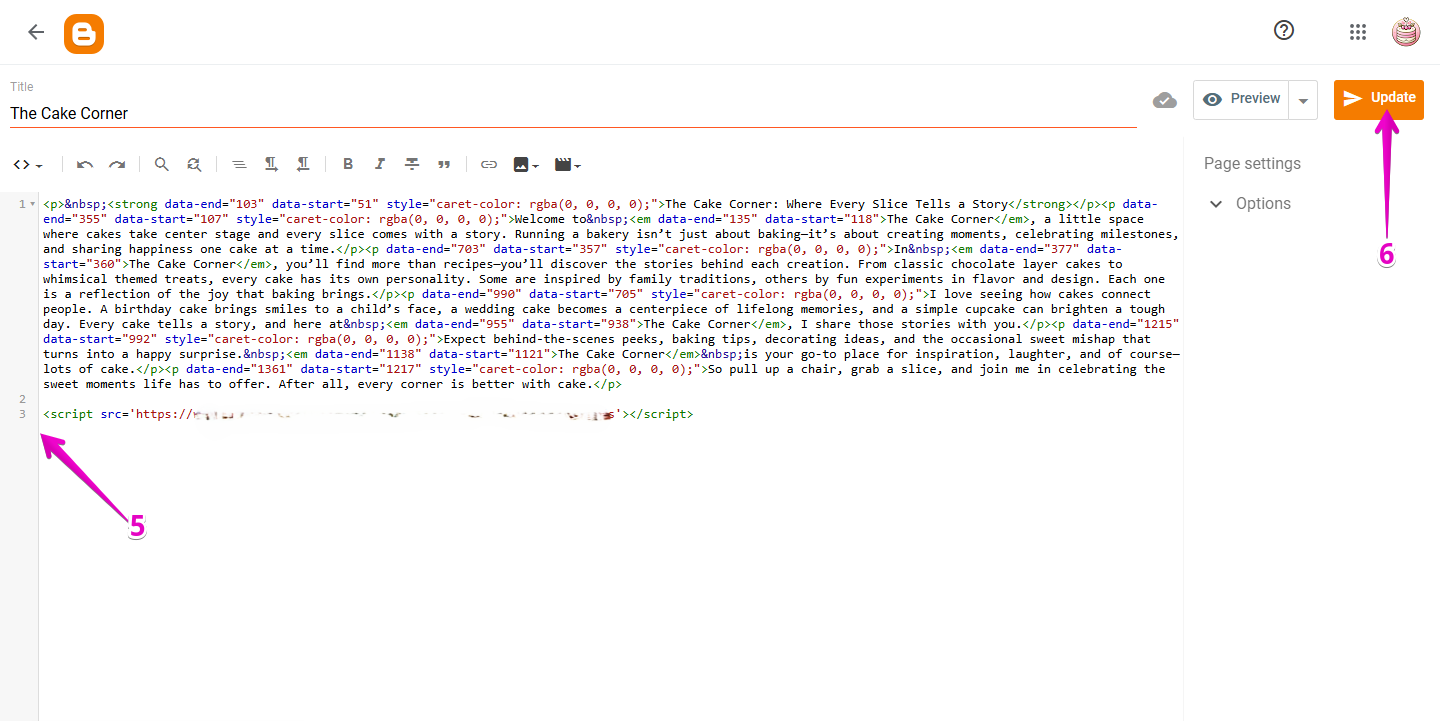
Step 3 — Paste the Privas AI Embed Code
- In the HTML editor area, paste your Privas AI Embed Code.
- Click Update in the top-right corner.
Step 4 — Publish the Page
- Click Publish (if required).
- Visit your website and refresh the page.
You should now see the chat icon appear.
What This Installation Does — and Does Not Do
This installation:
✔ Displays your assistant on the selected page
✔ Loads securely for visitors
✔ Works independently from Blogger tools
It does NOT:
✘ Modify your blog theme
✘ Change your layout structure
✘ Affect other pages or posts
✘ Alter SEO configuration
The widget simply connects your Blogger page to your configured Privas AI domain.
Optional — Install Site-Wide (Advanced)
If you want the assistant available on all pages:
- Go to Theme in the Blogger dashboard.
- Click Edit HTML.
- Locate the closing
</body>tag. - Paste the embed code just before it.
- Save your changes.
This affects your entire website.
It does not modify your content.
If the Widget Does Not Appear
- Confirm you switched to HTML View
- Make sure you clicked Update
- Refresh your browser
- Verify the full embed code was pasted correctly
Next Step
Continue to Test the Representative.
Before sharing publicly, confirm that your assistant represents your business clearly and accurately.