D. Widget Integration
Install Privas AI on WordPress
Add the Privas AI representative to your WordPress website
By aninditoUpdated 4 Mar 2026
WordPress is one of the most widely used website platforms, and adding the Privas AI representative only requires inserting a small embed script.
This guide explains how to install the Privas AI widget on a WordPress website. You can either place the assistant on a specific page or install it globally so it appears across your entire site.
There are two ways to install the Privas AI widget in WordPress:
- Add it to a specific post or page
- Install it globally across your entire website
Choose the method that matches how you want visitors to access the assistant.
Option 1 — Add the Assistant to a Specific Post or Page
Use this option if you want the assistant to appear only on selected content.
Why this matters
This method allows you to test the assistant on a limited page before enabling it site-wide.
It affects only the page where you place the embed code.
It does not change your theme, layout, or other pages.
Adding Your Chatbot to Your WordPress Posts or Pages
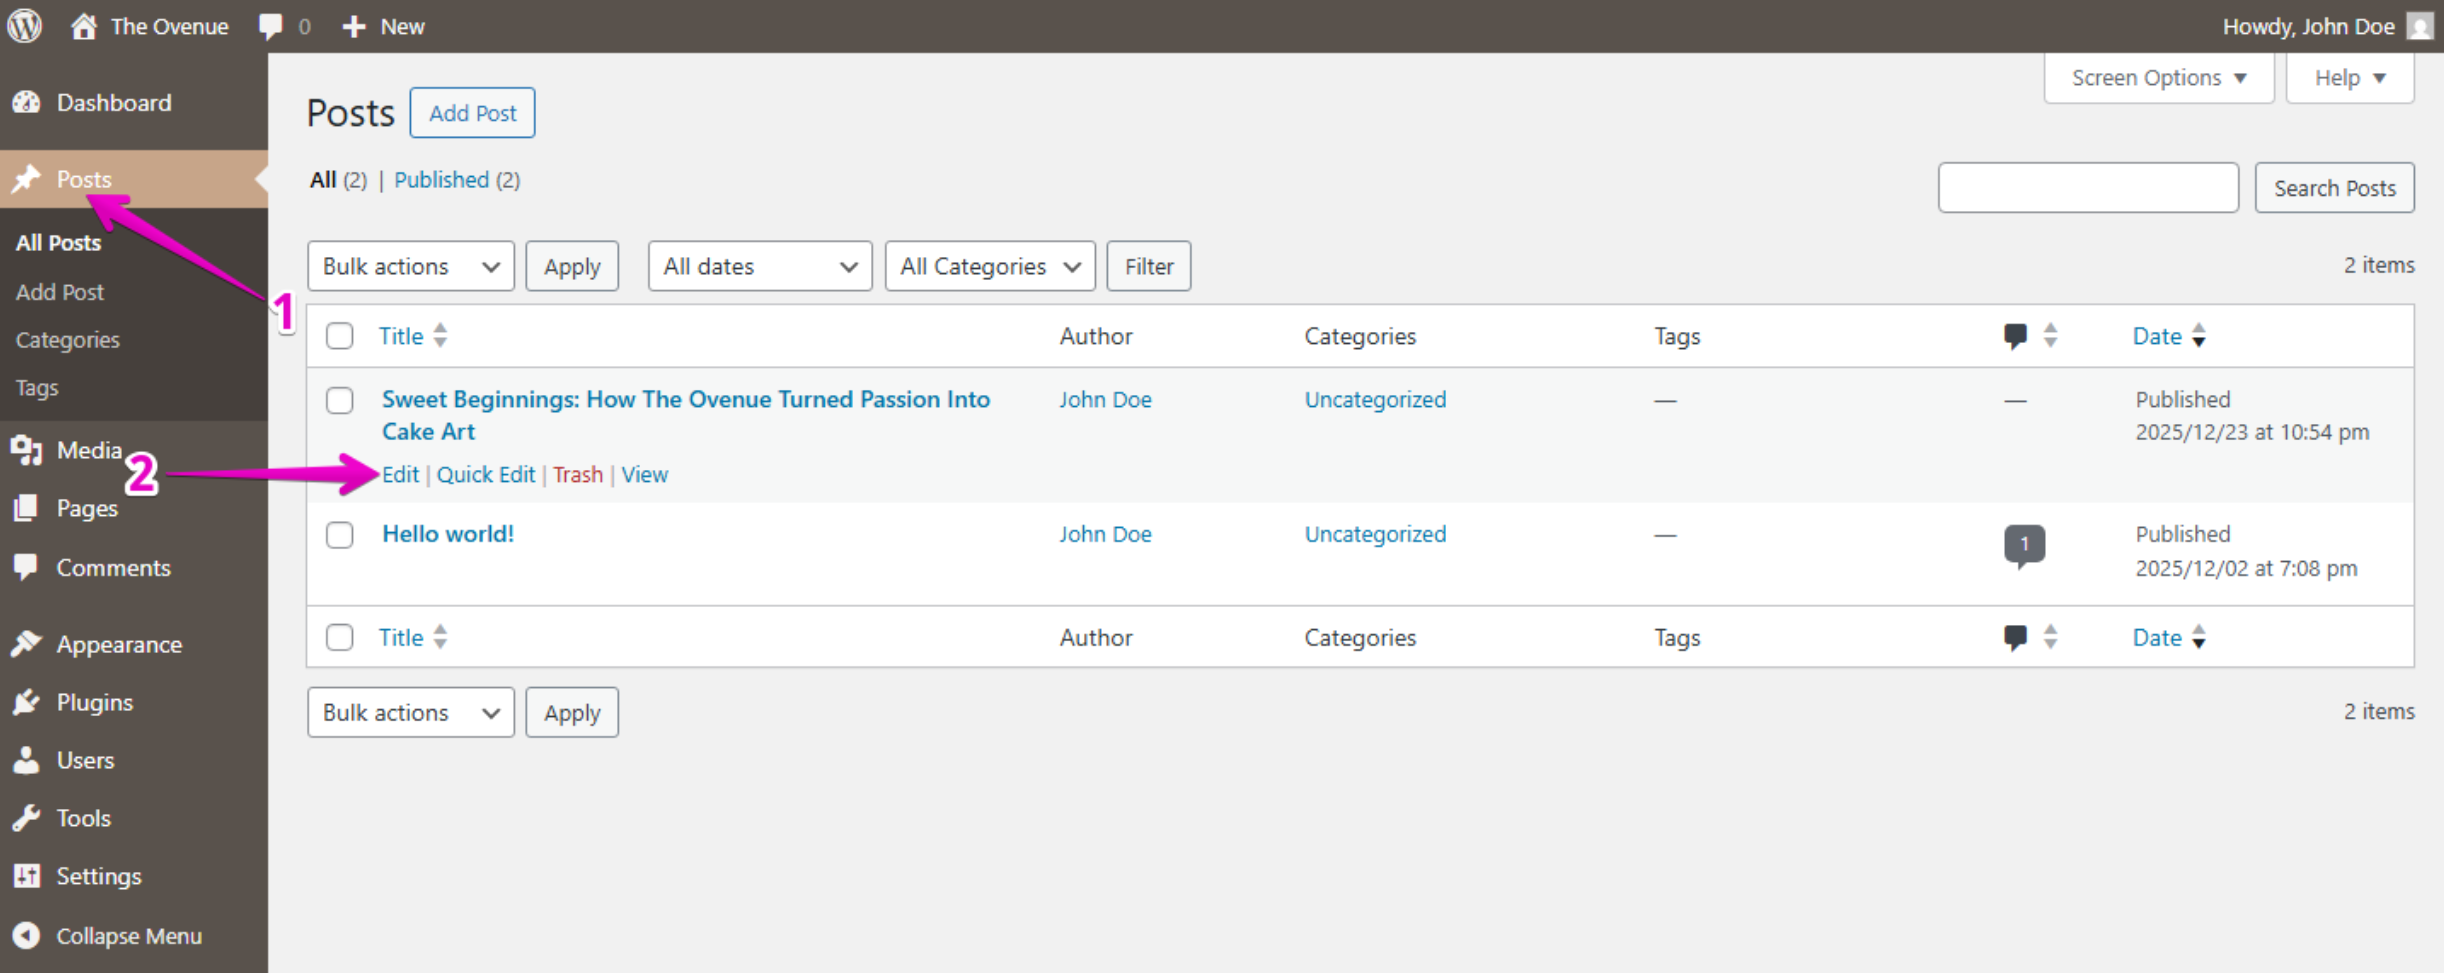
Step 1 — Open the Page Editor
- Log in to your WordPress Account.
- In the left menu of your Dashboard, click on Posts or Pages.
- Hover over the post or page where you want to add your chatbot.
- Click the Edit link below its title.
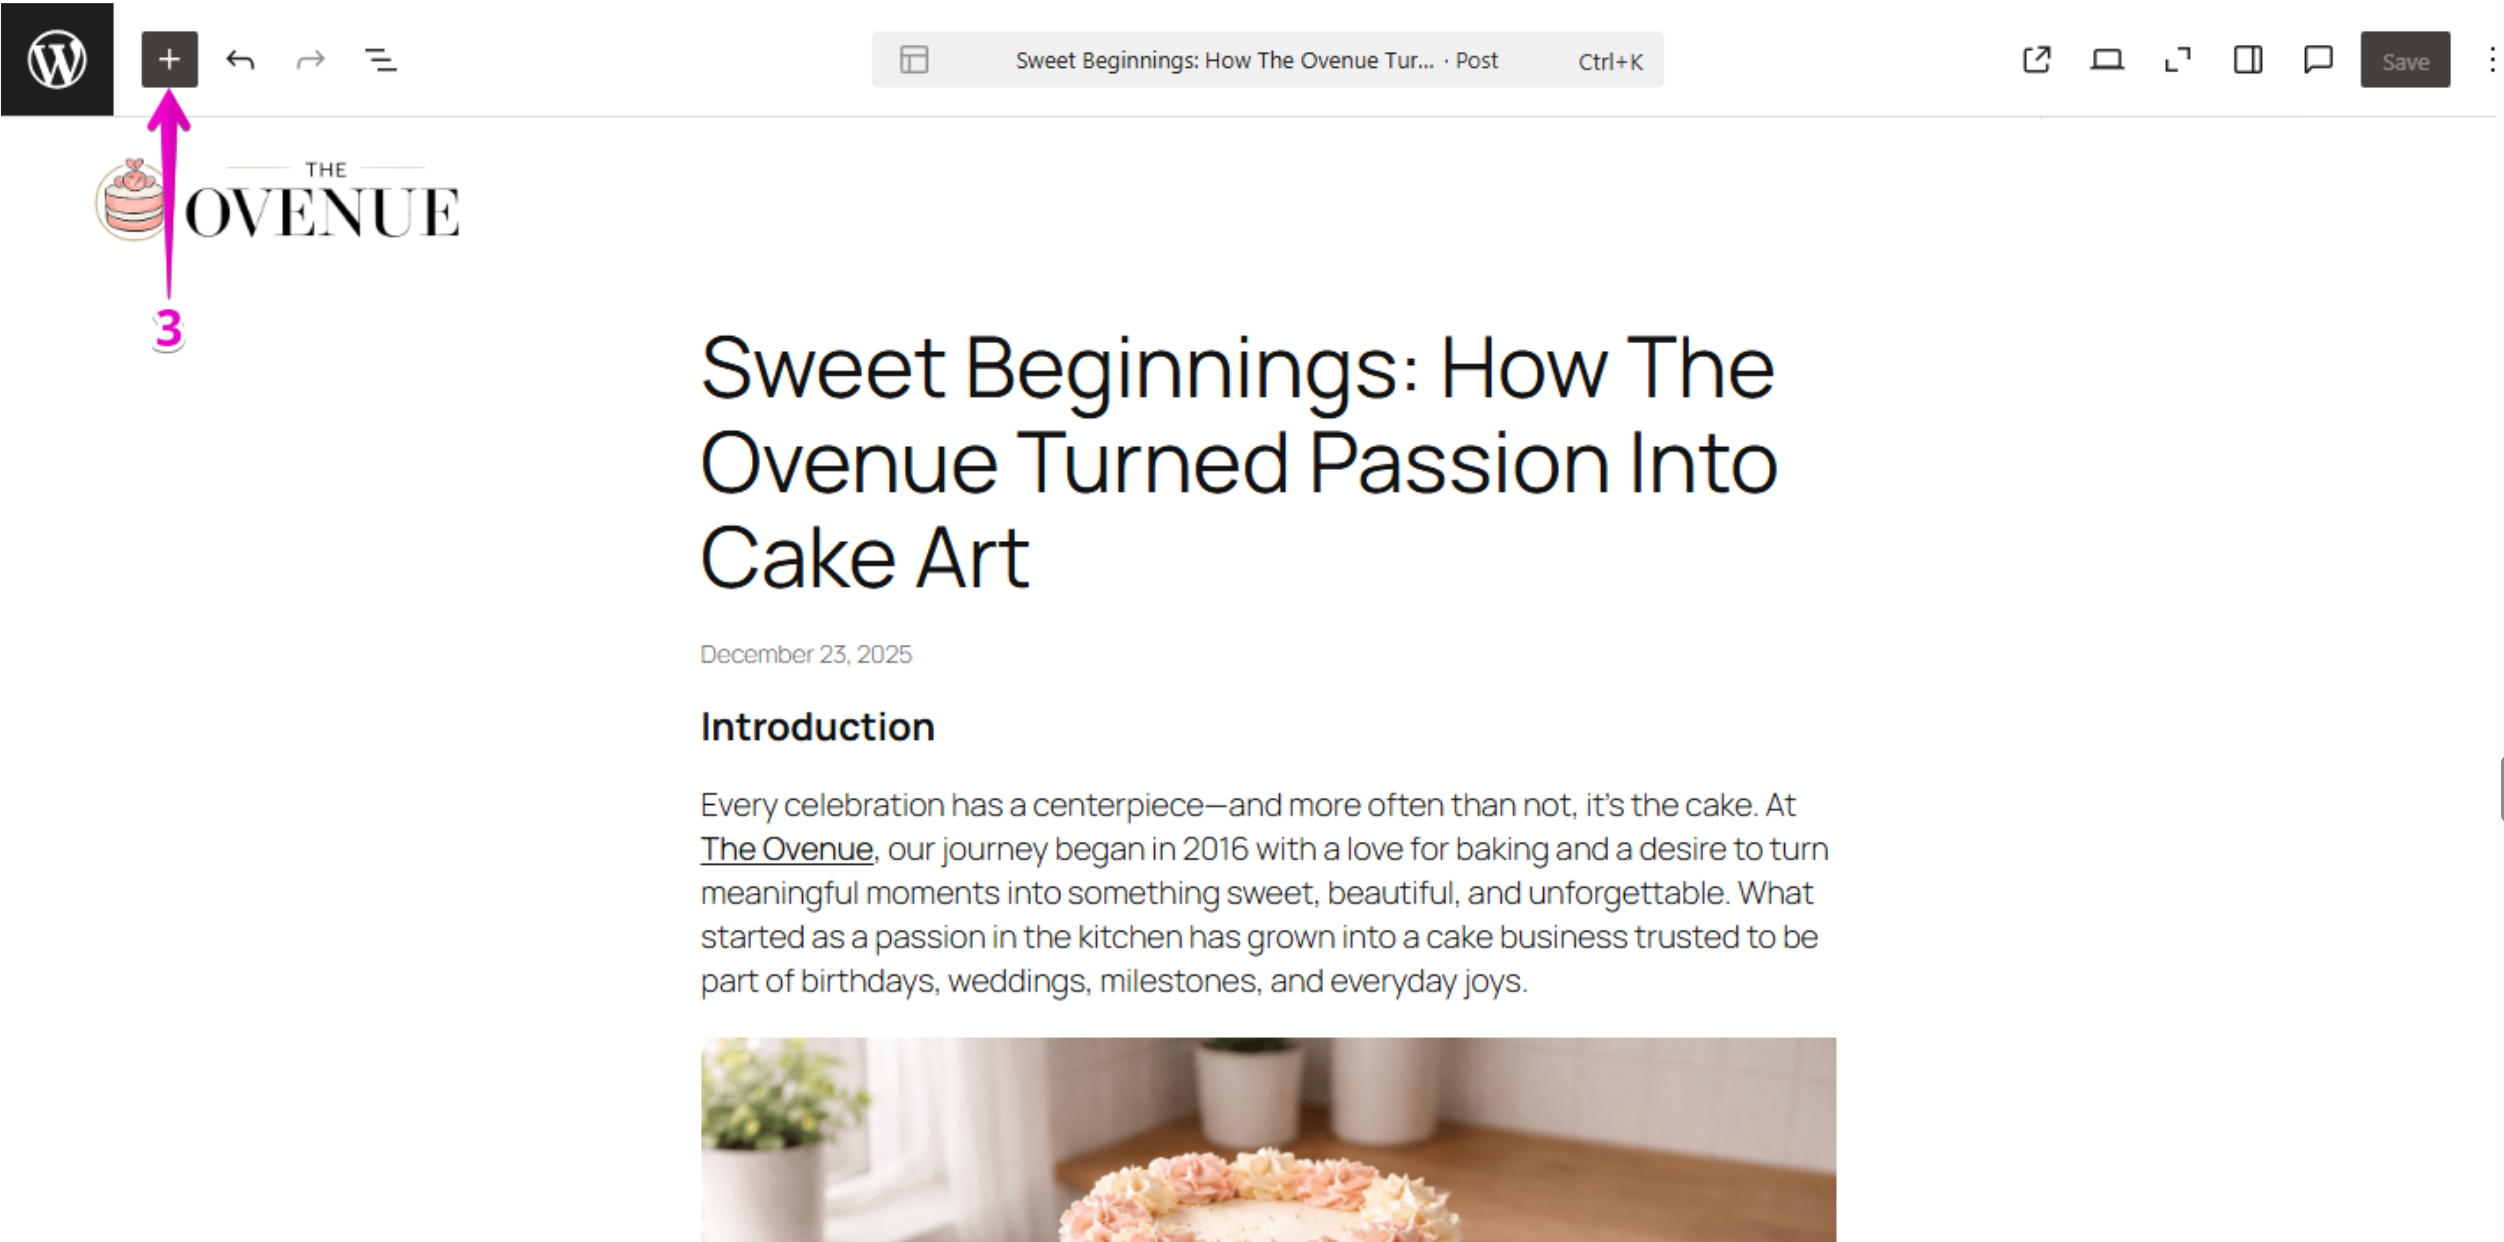
Step 2 — Add a Custom HTML Block
- Inside the WordPress Block Editor, click the Plus (+) icon in the top-left corner.
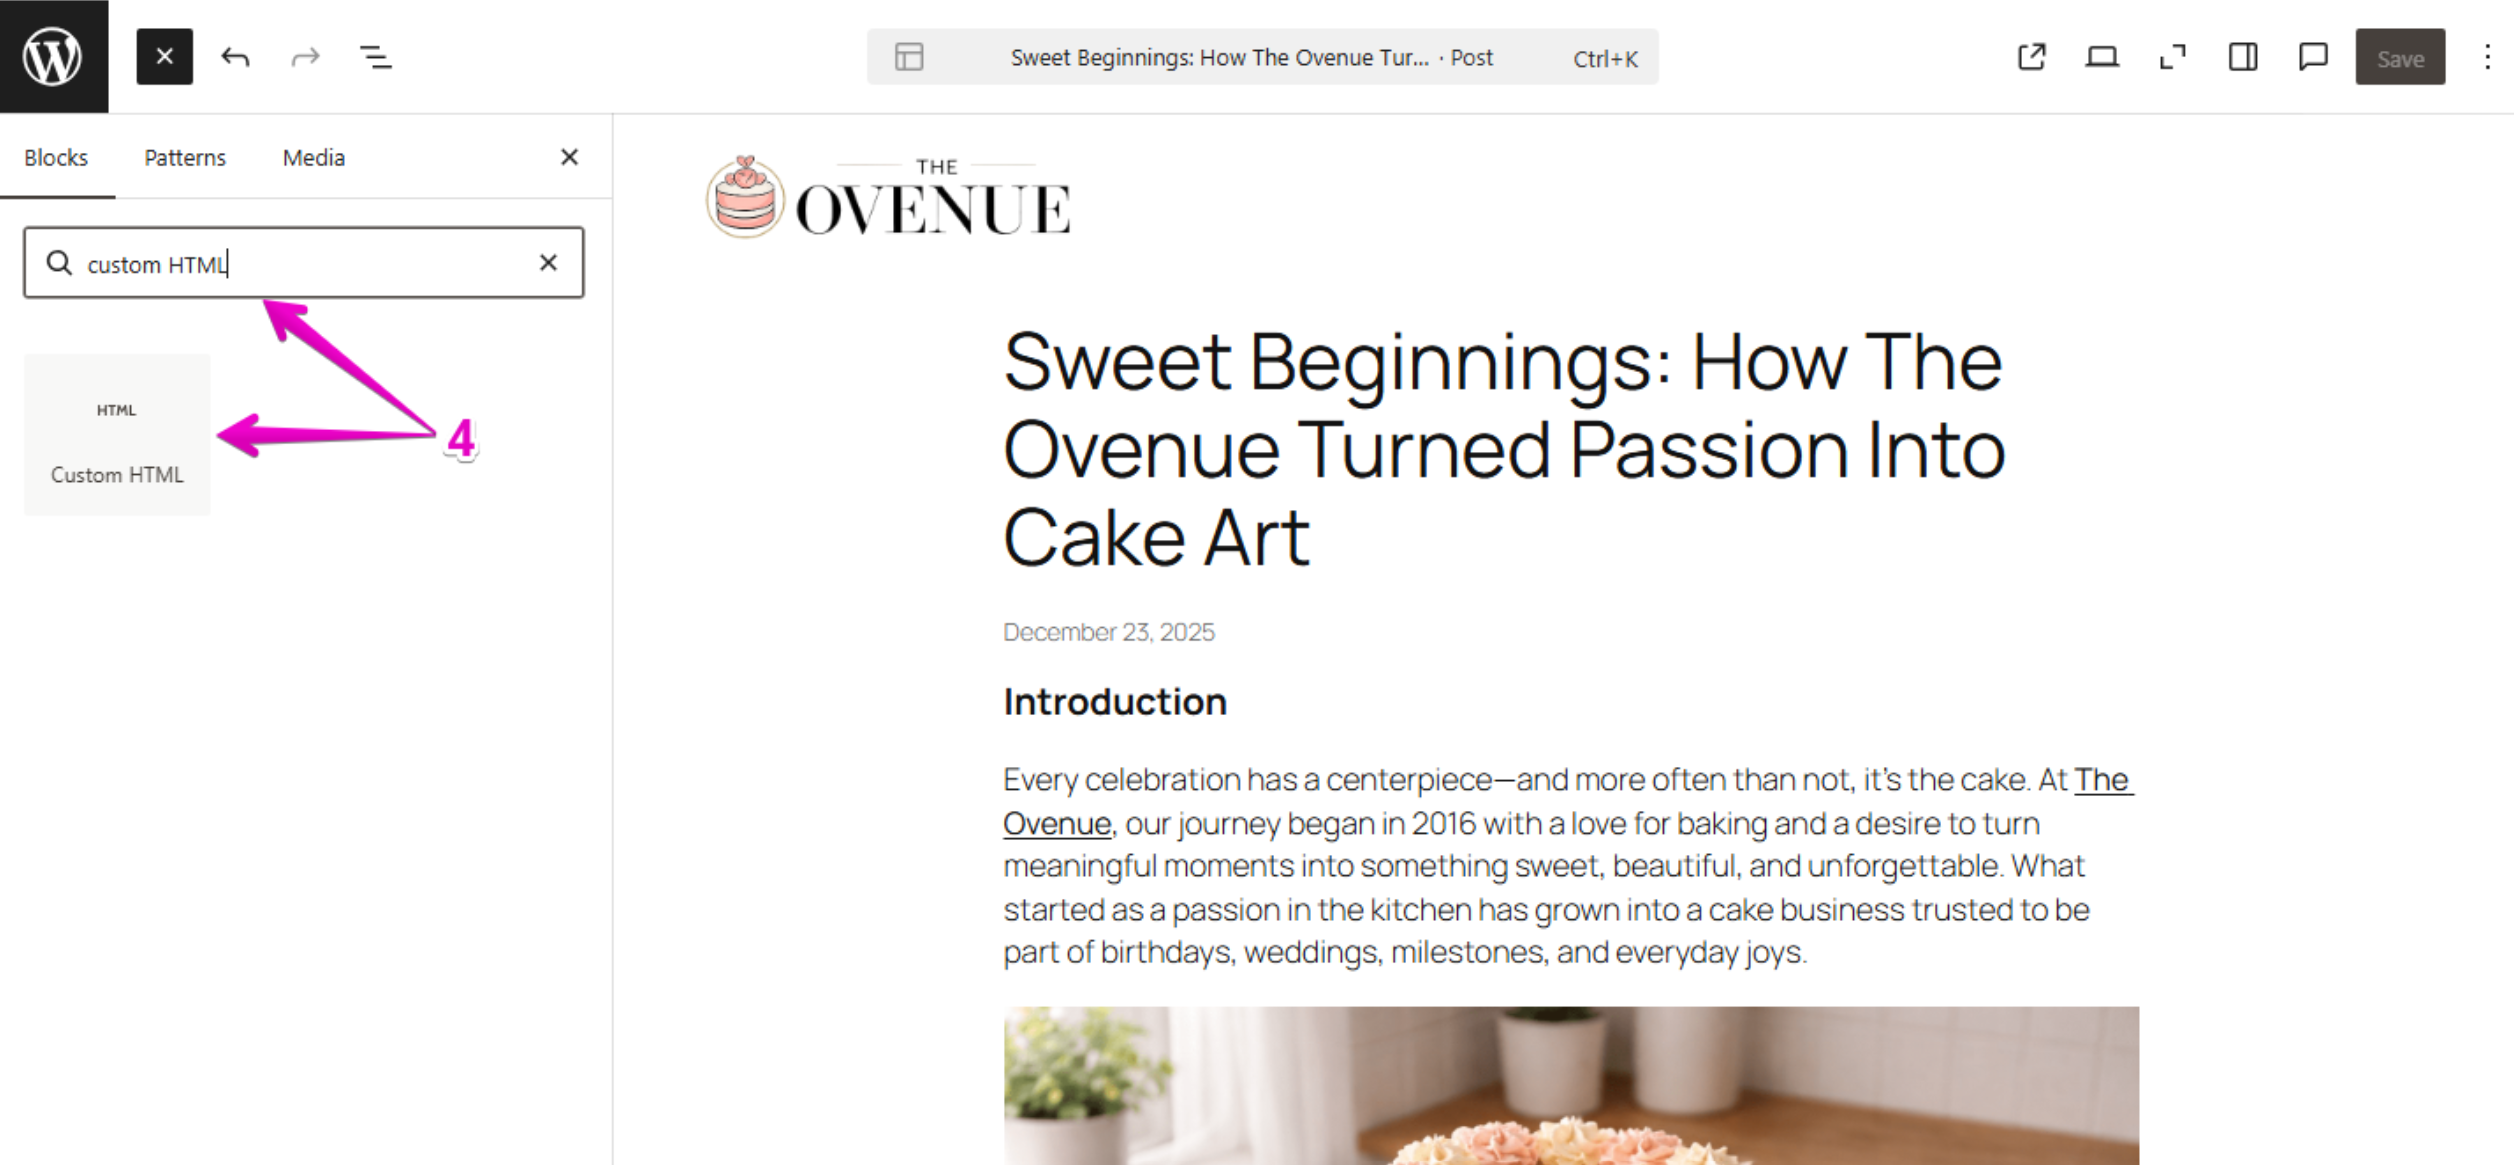
- In the block search field, type Custom HTML.
- Click on Custom HTML to insert the block into your page.
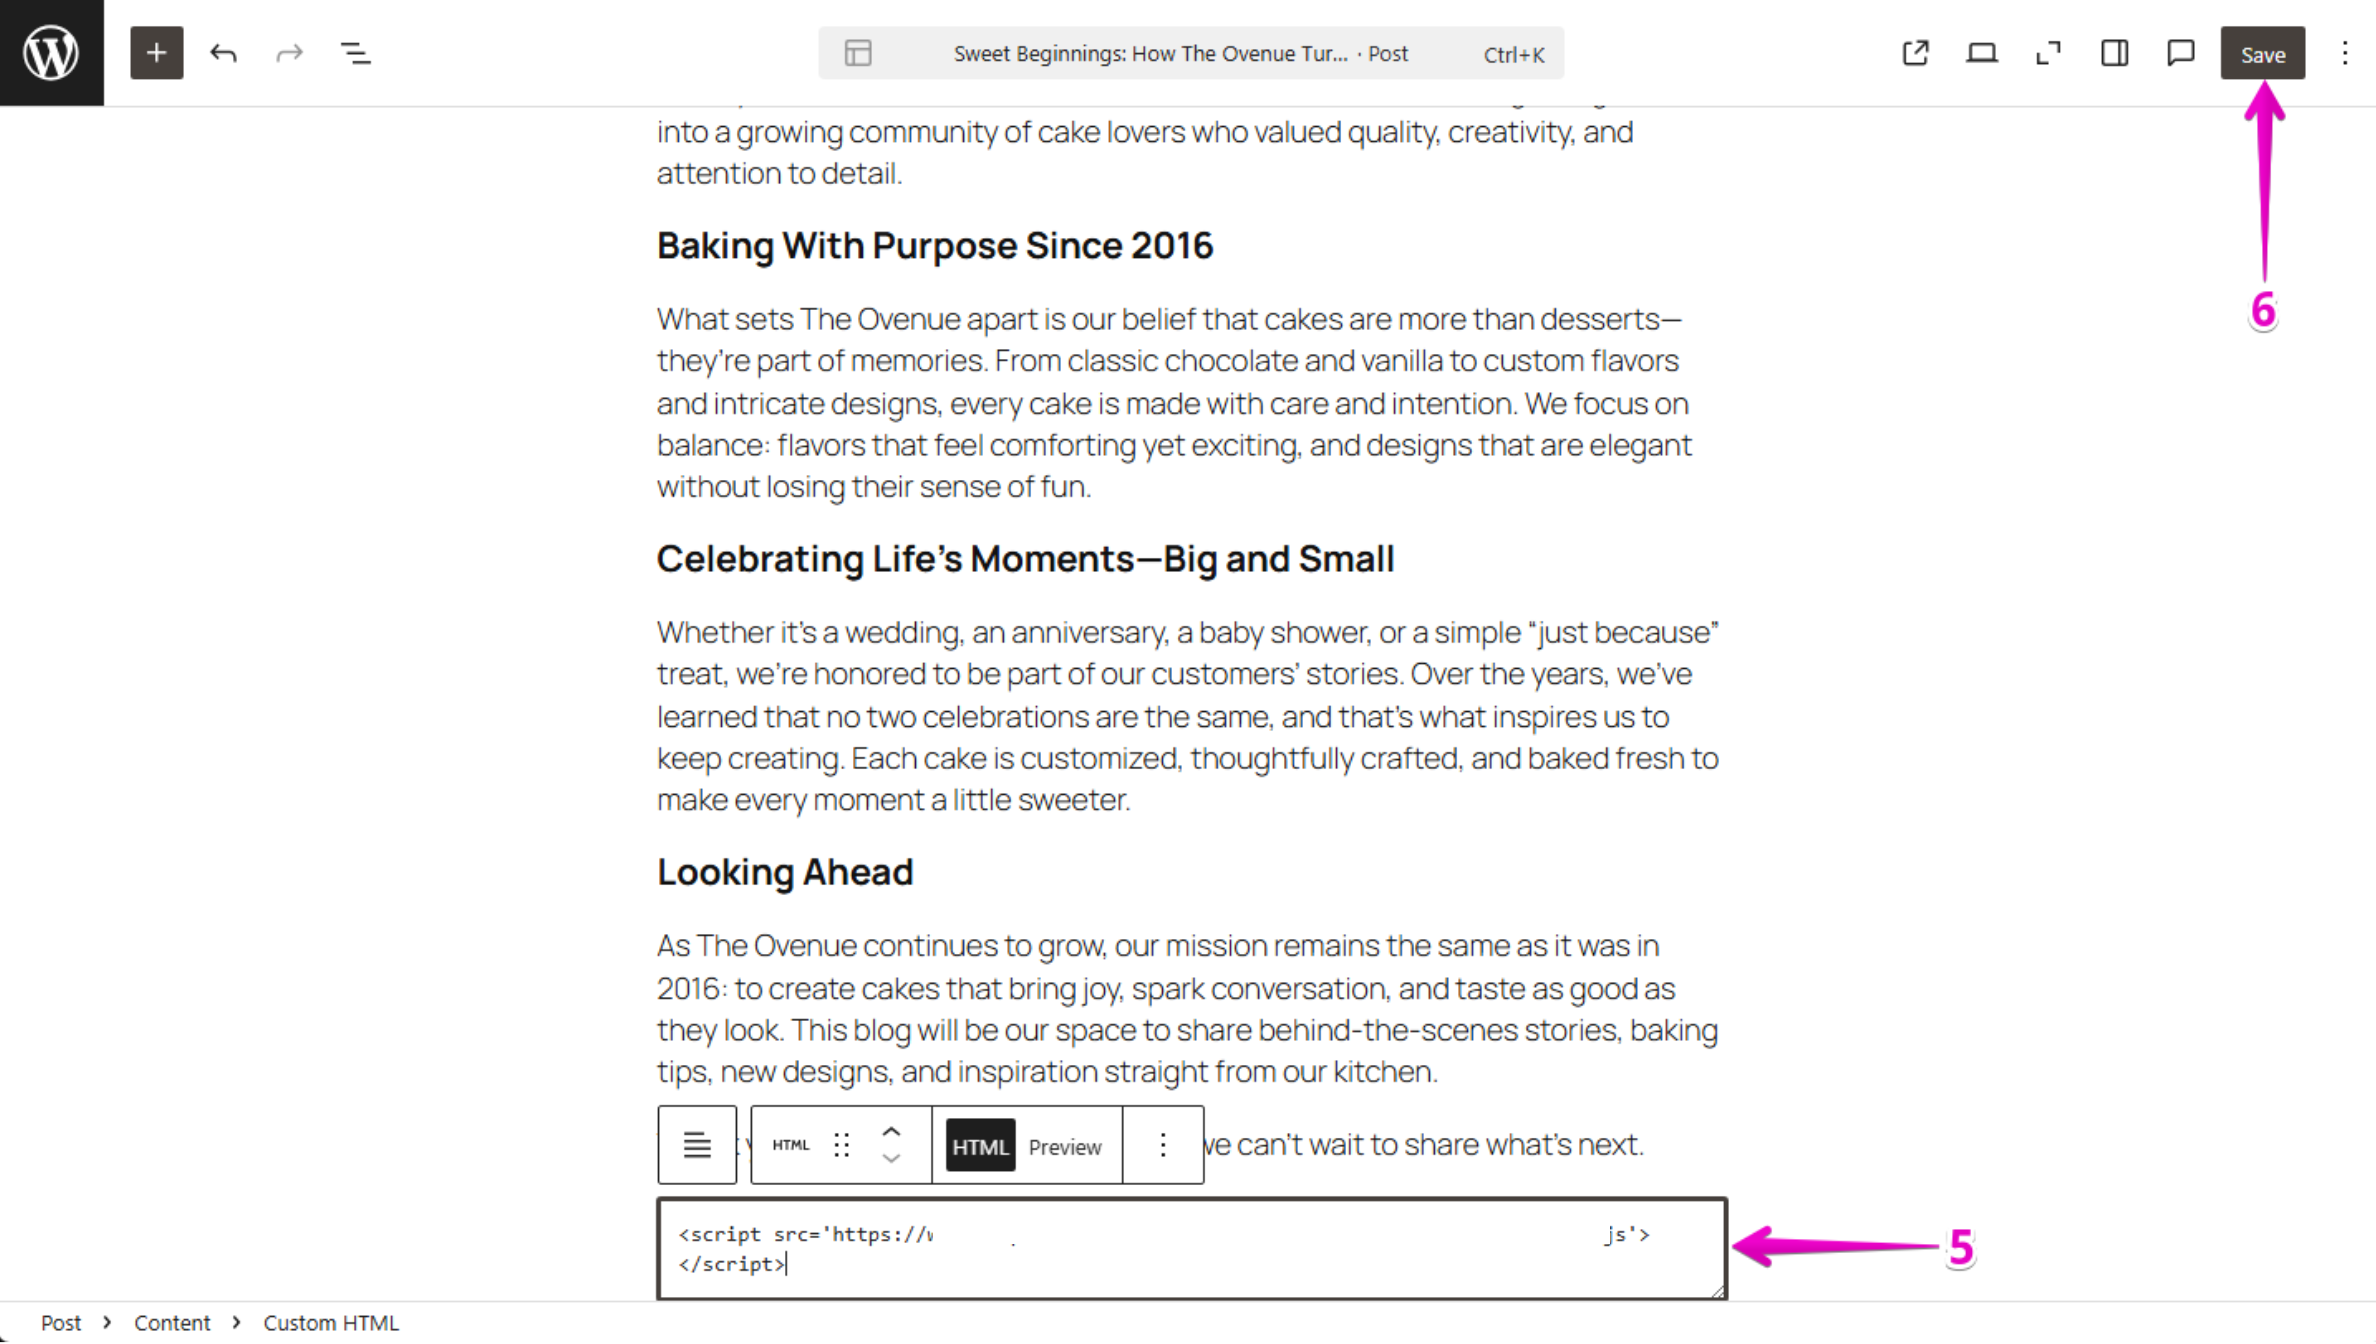
Step 3 — Paste the Embed Code
- Go to your Privas AI Domain.
- Copy your Website Widget Embed Code.
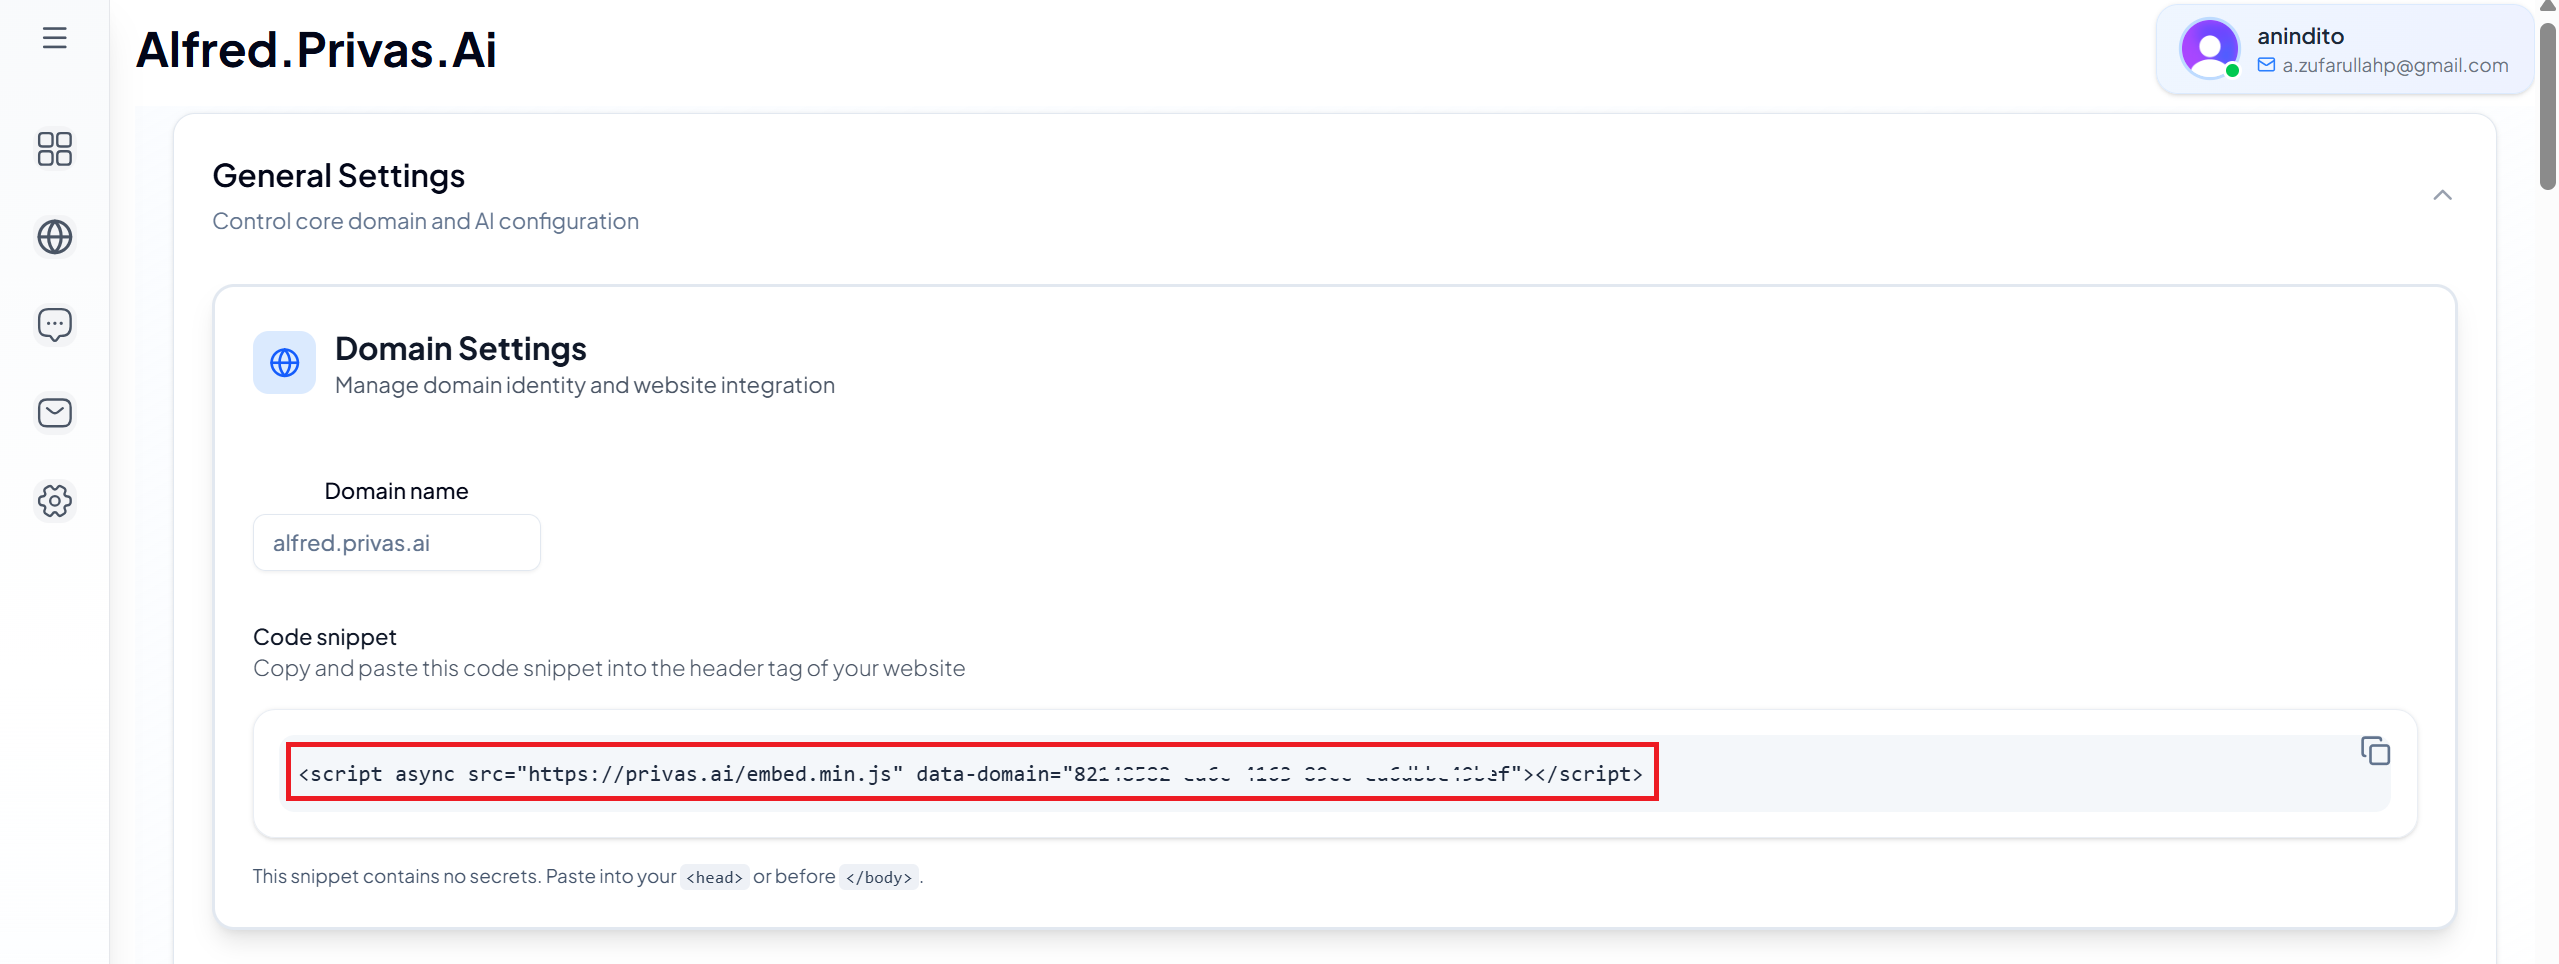
- Paste the full embed code into the Custom HTML block.
- Click Save or Update in the top-right corner.
That’s it.
Your chatbot is now live on that specific page.
Option 2 — Install the Assistant Globally (Recommended)
Use this option if you want the assistant to appear on every page of your website.
Why this matters
Installing globally ensures:
- Visitors can access the assistant from any page
- The experience is consistent
- You do not need to manually edit multiple pages
This affects your entire website layout.
It does not modify your content, SEO settings, or visual design.
Method A — Add to Theme Footer
This is the most common global installation method.
Step 1 — Open the Theme Editor
- Go to WordPress Dashboard.
- Click Appearance → Theme File Editor.
- Locate the file named footer.php.
Step 2 — Paste the Embed Code
- Scroll to the bottom of the
footer.phpfile. - Paste the Privas AI embed code just before the closing
</body>tag. - Click Update File.
After saving, refresh your website.
The assistant should now appear on all pages.
Method B — Use a Header & Footer Plugin (No File Editing)
If you prefer not to edit theme files, use a plugin.
Why this matters
This method:
- Is safer for non-technical users
- Prevents issues during theme updates
- Does not require editing core files
Steps
- Install a plugin such as Insert Headers and Footers.
- Go to Settings → Insert Headers and Footers.
- Paste the Privas AI embed code inside the Footer Scripts section.
- Click Save.
The assistant will now load across your entire website.
After Installation — What to Expect
- A chat icon appears in the corner of your website.
- The assistant loads automatically.
- Visitors can begin interacting immediately.
If the widget does not appear:
- Refresh the page.
- Clear your browser cache.
- Confirm the full embed code was pasted correctly.
What This Installation Does — and Does Not Do
Installing the widget:
✔ Displays your domain-scoped assistant
✔ Loads securely on your website
✔ Works independently from your content
It does NOT:
✘ Change your website layout
✘ Modify your content
✘ Affect SEO structure
✘ Access external data
The widget simply connects your website to your configured Privas AI domain.
Your AI representative is now successfully installed on WordPress and ready to interact with visitors.
Next Step
Continue to Test the Representative.
Before announcing it publicly, confirm that your assistant represents your business clearly and accurately.